Concrete Garage Apron: Basics, Best Practices & Detailed 12-Step Installation Guide
As an Amazon Associate, I earn from qualifying purchases.
What is a Concrete Garage Apron?
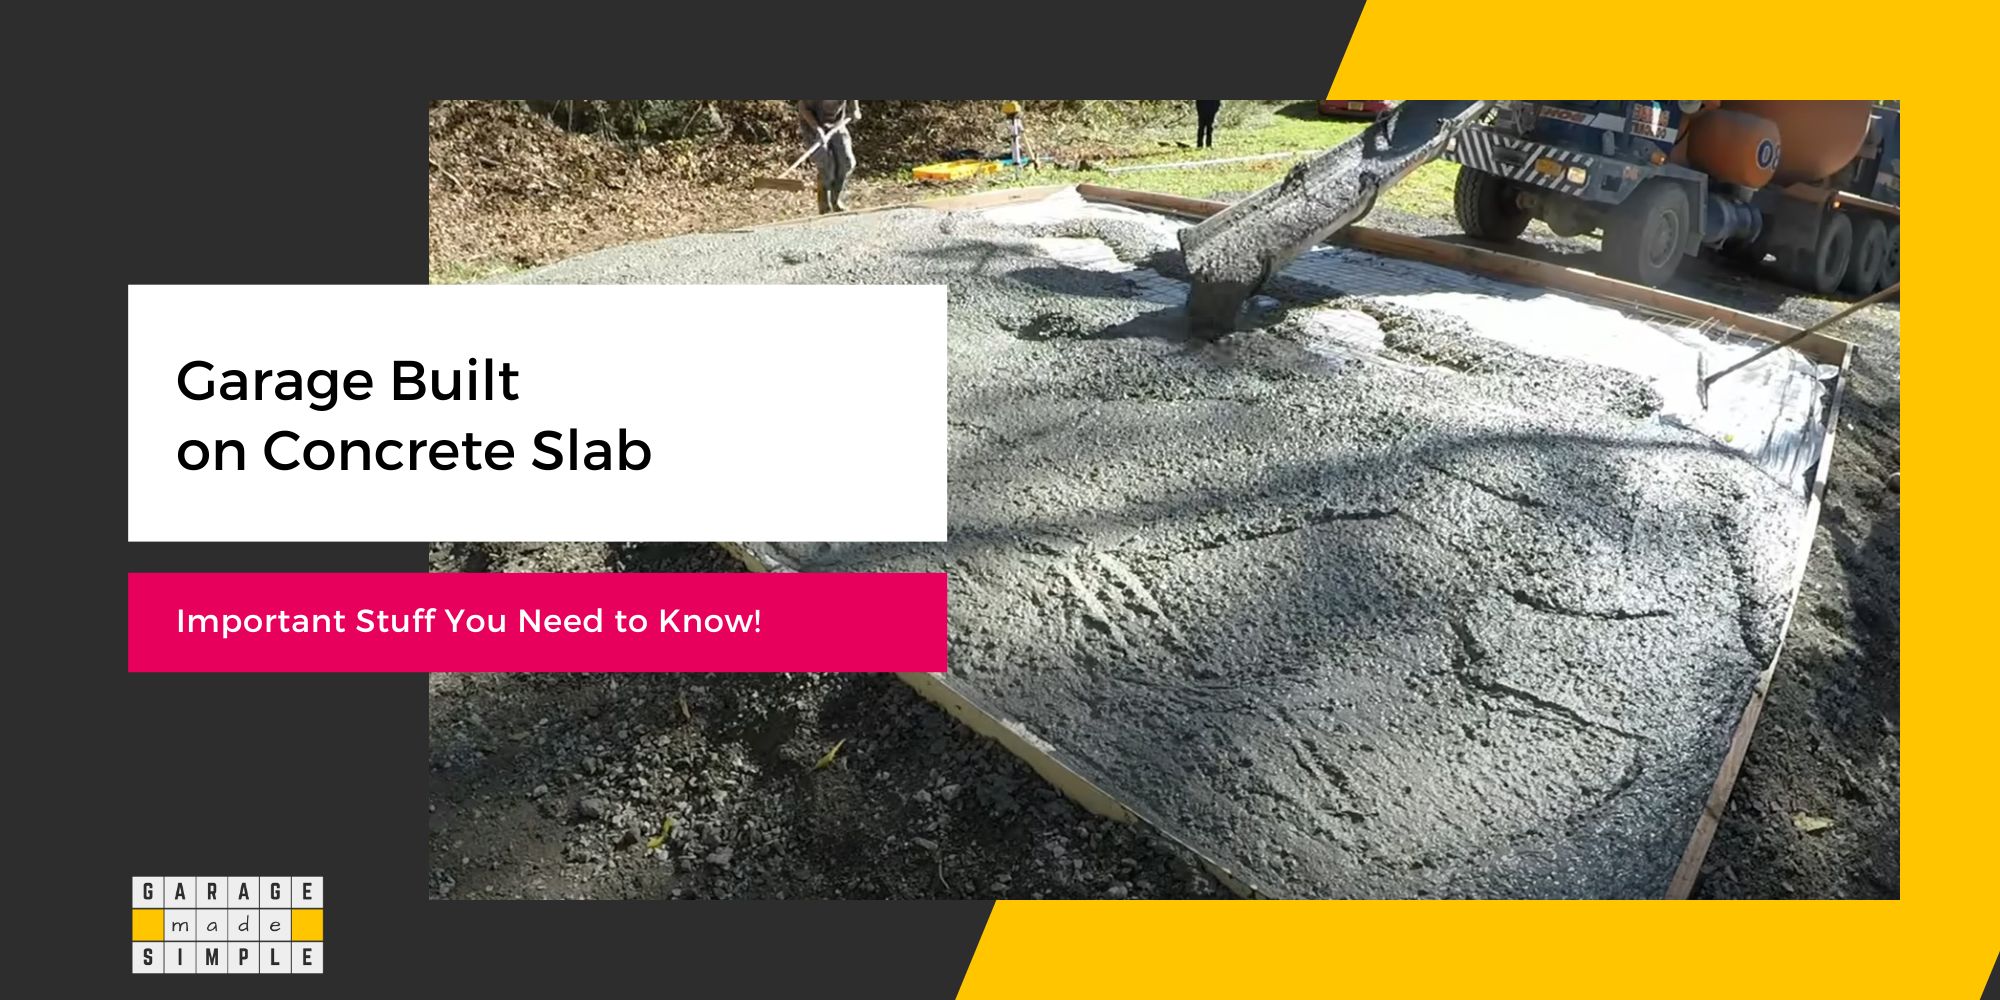
The concrete garage apron is the gradually sloping slab in front of the garage door that connects the garage floor to the driveway, creating a smooth slope transition between the two surfaces. This is necessary as the two surfaces are on two different grades.
The apron can be 2 to 6 feet wide and run the entire width of the garage door. Some homeowners may even run it around the full garage perimeter.
Concrete Garage Apron Benefits
The concrete garage apron is more than a cosmetic detail; it serves several practical purposes:
- Water Diversion & Drainage: A properly sloped concrete apron prevents water pooling at the garage entrance by guiding it toward the driveway or drains.
- Prevents Cracks & Shifting: It protects the edges of the garage floor and driveway from cracking, shifting, and freeze-thaw cycles.
- Moisture Management: The apron helps prevent moisture intrusion into the garage slab, which can cause deterioration over time, by sealing the gap between the two surfaces. It prevents rainwater and snowmelt from entering the garage or seeping into the foundation.
- Smoother Vehicle Access: The apron slopes from the concrete garage floor to the driveway, making it easier to drive vehicles in and out without damaging tires or scraping the bottom of your car.
- Curb Appeal & Visual Demarcation: Beyond functionality, the apron provides a clear visual separation between the garage and driveway, enhancing curb appeal. Sometimes the concrete garage apron may be of a different color or even have a stamping.
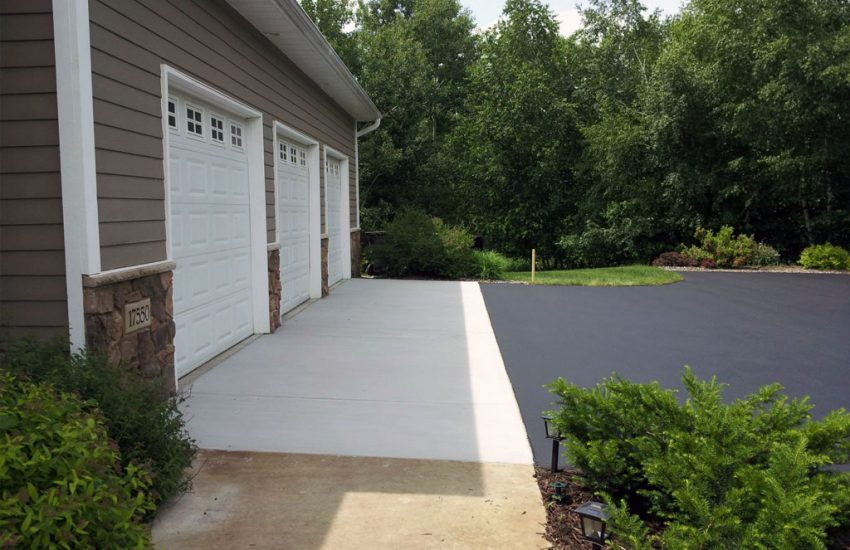
If you live in Florida you should contact Aurora Asphalt & Concrete for your Concrete Garage Apron needs. They have the expertise and experience to take on any asphalt or concrete job.
This is an excellent example of their workmanship!
Why Do You Need a Concrete Garage Apron?
A concrete garage apron is more than a smooth transition between the driveway and garage. It offers key functional and aesthetic benefits, making it an essential feature for any homeowner.
Prevents Water Pooling and Improves Drainage
A properly sloped apron aids in water diversion away from the garage, preventing water pooling and reducing the risk of moisture damage.
Adding drains beneath the apron can further improve water management. The Concrete Garage Apron can, therefore, be an effective solution for water diversion.
Installing a drain along the concrete garage apron, parallel to the garage door is very helpful. Without this drain, rainwater or melting snow can flood the garage. The drain captures rainwater or snow melt and safely redirects it to the stormwater drainage system.
A Garage Water Diverter, typically a trench drain, is placed in the concrete garage apron or at the driveway-apron junction. These drains are often wide and covered with steel grates, which help collect water while preventing debris from clogging the drain.
For a modern style, consider the U-drain trench drain from Canada. Its SINGLE SLOT INTAKE offers a sleek design and easier maintenance.
Once installed, only the slot remains visible, providing a tidy finish. Cleaning is simple—just insert a paddle and glide it along the drain to the sump pit.
The benefits of U-drain are:
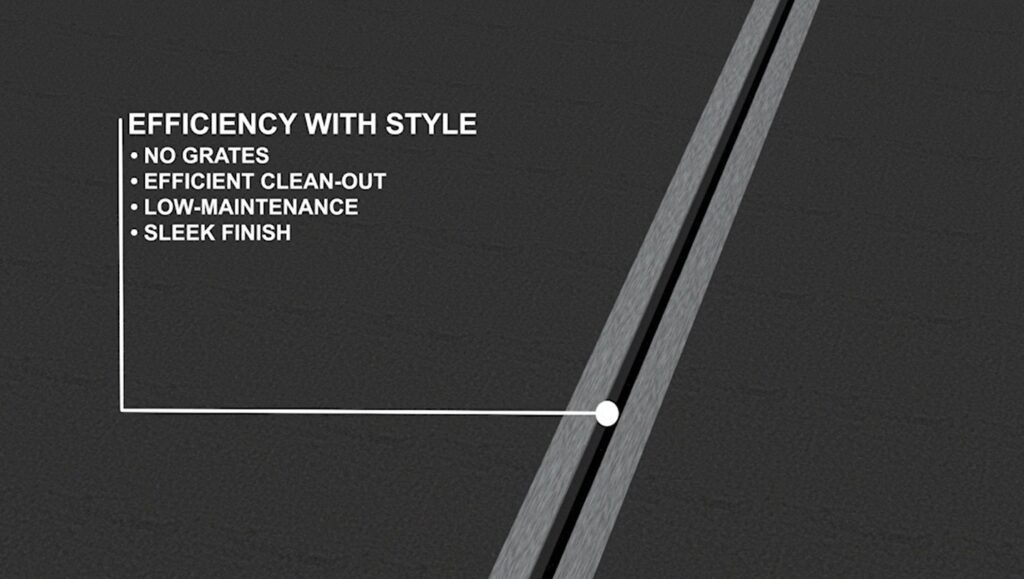
(Note: I am not affiliated with U-drain and receive no financial benefits.)
Protects the Garage Floor and Driveway from Cracking
Without an apron, the driveway and garage floor edges are prone to cracking or shifting, especially during freeze-thaw cycles. The apron reinforces these edges. It acts as a buffer to prevent cracks and structural movement.
Manages Moisture and Freeze-Thaw Cycles
Aprons help with concrete moisture management by sealing the gap between the garage and driveway. This reduces water intrusion and mitigates the effects of temperature changes that can weaken concrete.
Improves Vehicle Access and Minimizes Wear
Driveways are designed to be lower than the garage floor to prevent flooding. Even if the driveway was at the same level, it would ultimately sink below the garage floor. The garage floor is on a foundation & footings and is less prone to sinking.
The Concrete Garage Apron facilitates a smooth transition between the driveway and garage. The apron is poured with a gradual slope.
The smooth slope transition makes it easier for vehicles to move in and out. The slope prevents damage to your car’s bumpers and tires.
Enhances Curb Appeal and Defines the Space
A concrete apron in front of the garage provides a clean, professional look, creating visual separation between the driveway and the garage. It adds to the curb appeal and increases your home’s overall value.
Can be Used for Radiant Heating Installation
Are you tired of shoveling snow in front of your garage door? Here’s a simple solution: install radiant heating in your concrete garage apron!
With the press of a button, snow will melt away, eliminating the need for salt or shoveling. If you have a drain in your apron, melted snow will flow safely into the stormwater drain.
Radiant heating can use electric coils or hot water pipes, both working on the same principle. The wonderful folks at WarmlyYours have this lovely schematic, which explains it all.
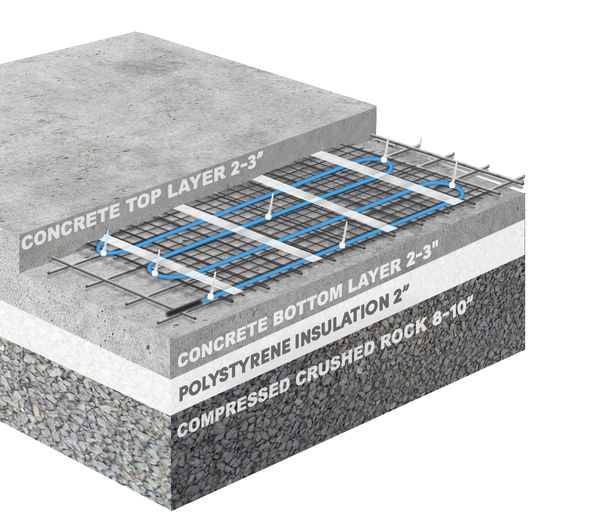
Disclaimer: I am not an affiliate and have no financial or other benefits from WarmlyYours.
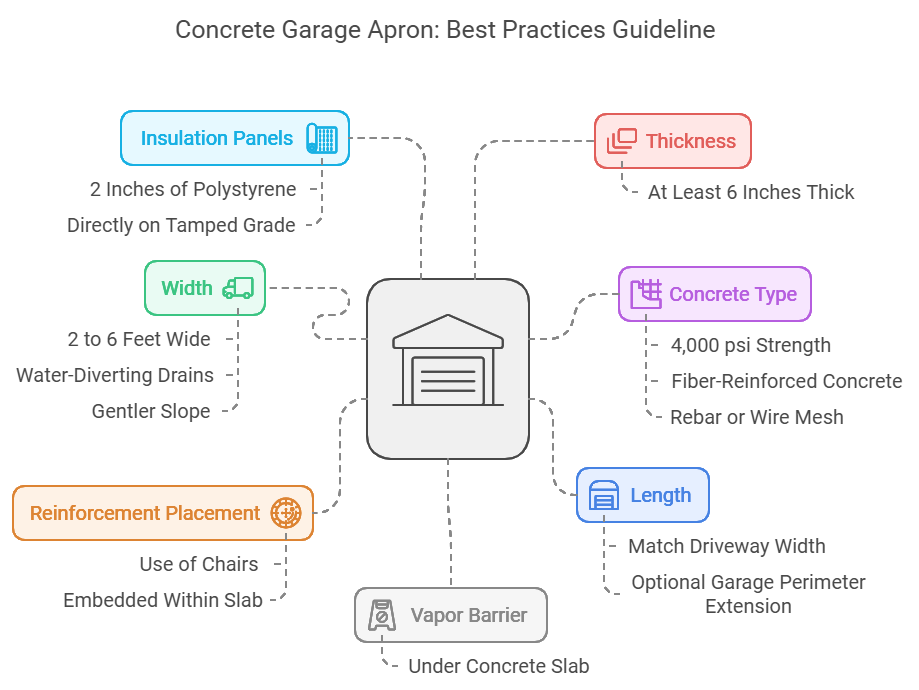
Concrete Garage Apron: Best Practices Guideline
When installing a concrete garage apron, adhere to local building codes for the curbside apron. While specific codes for garage aprons may not exist, following these best practice guidelines will ensure optimal results.
Length: The apron should match the width of the driveway or the garage, whichever is greater. Extending the apron to encompass the garage perimeter is optional but can be beneficial.
Width: There are no strict rules, but garage aprons typically range from 2 to 6 feet wide. A wider apron allows for the addition of water-diverting drains and radiant heating. The slope can be gentler too!
Thickness: The apron should be at least 6 inches thick to provide necessary strength and prevent crumbling.
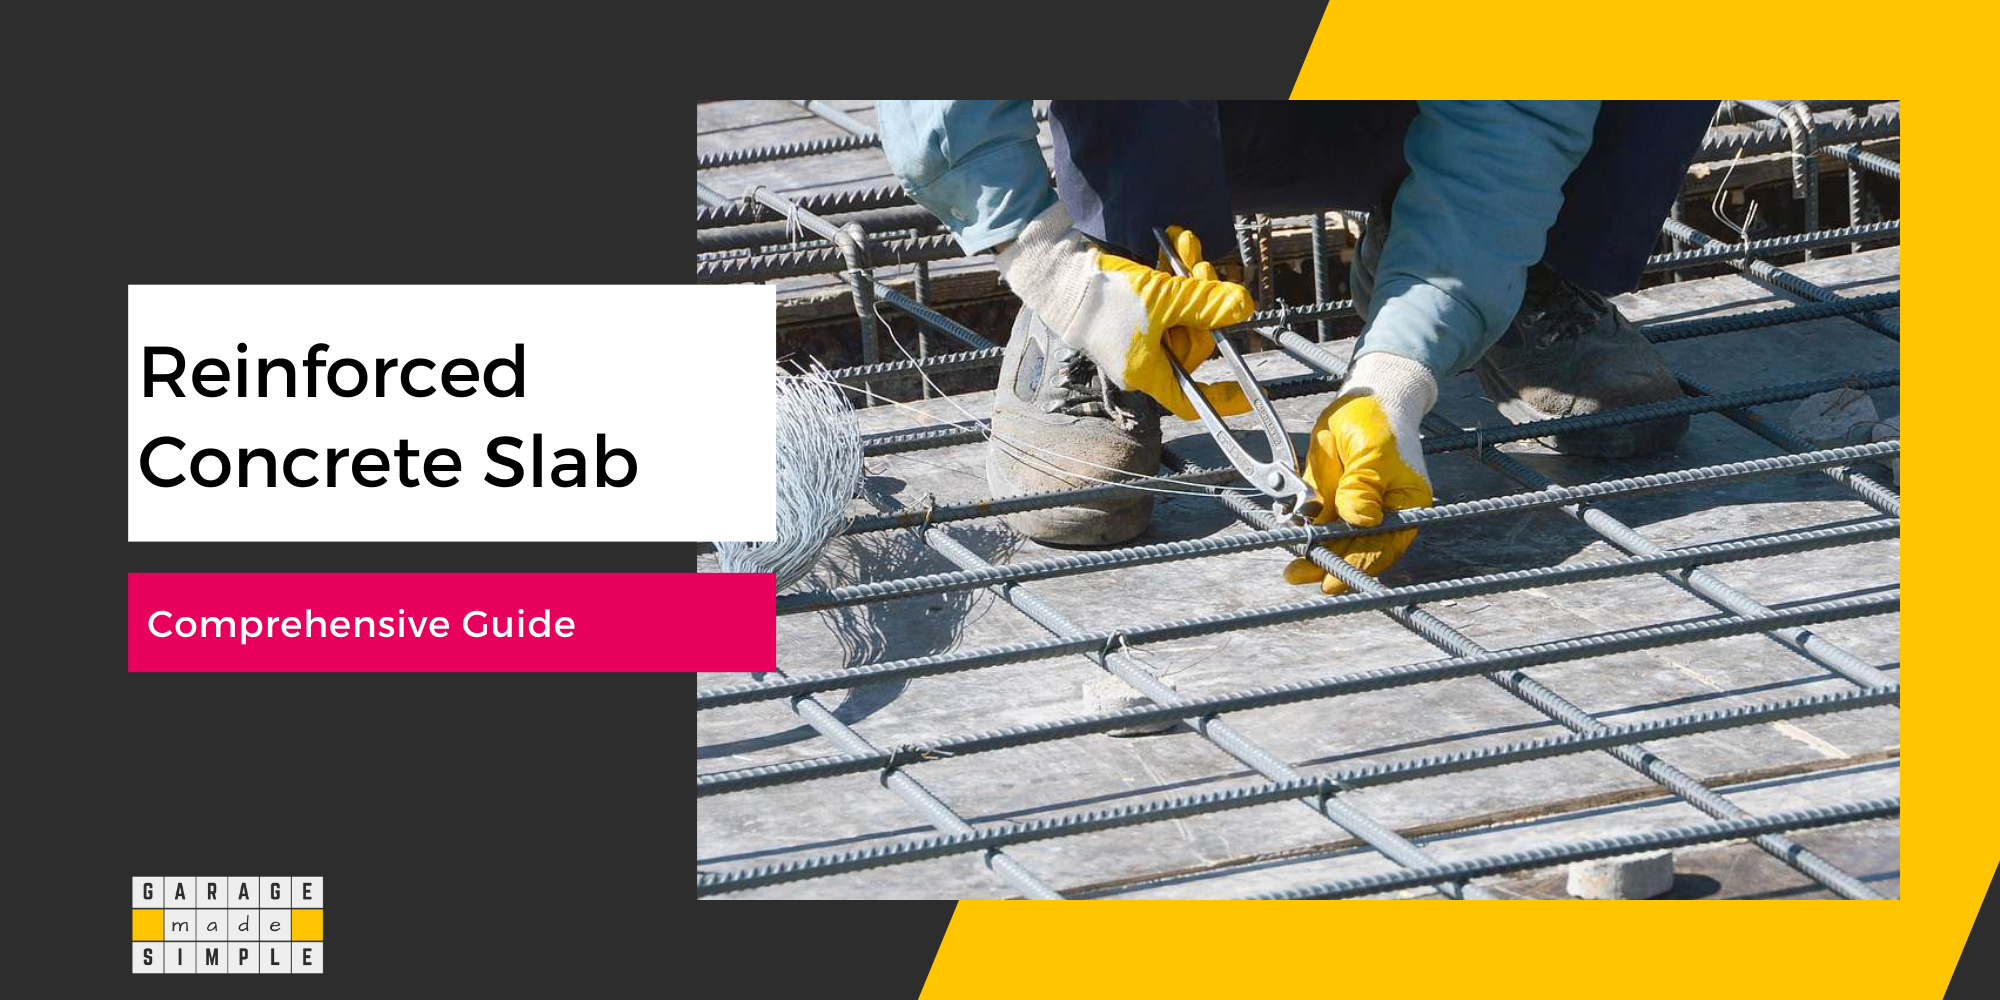
Concrete Type: Use concrete with a strength of 4,000 psi, preferably fiber-reinforced. Reinforce with rebar or wire mesh to enhance strength and durability.
Placement of Reinforcement: Always use “chairs” to keep rebar or wire mesh embedded within the concrete slab. Placing them on the grade or insulation panels is ineffective and a waste of resources.
Insulation Panels: Install 2 inches of Polystyrene Insulation Panels directly on the tamped grade, especially if you plan to incorporate radiant heating.
Vapor Barrier: Install a vapor barrier directly under the concrete slab for the best results.
Planning Your Concrete Garage Apron Project
Proper planning ensures a successful garage apron installation. Below are key aspects to consider when preparing for your project.
Driveway Slope and Drainage Considerations
Plan the apron slope carefully to direct water away from the garage to prevent water from pooling within the garage.
If your area experiences heavy rain, consider installing drains beneath the apron to enhance water diversion and avoid erosion.
Budgeting and Cost Estimates
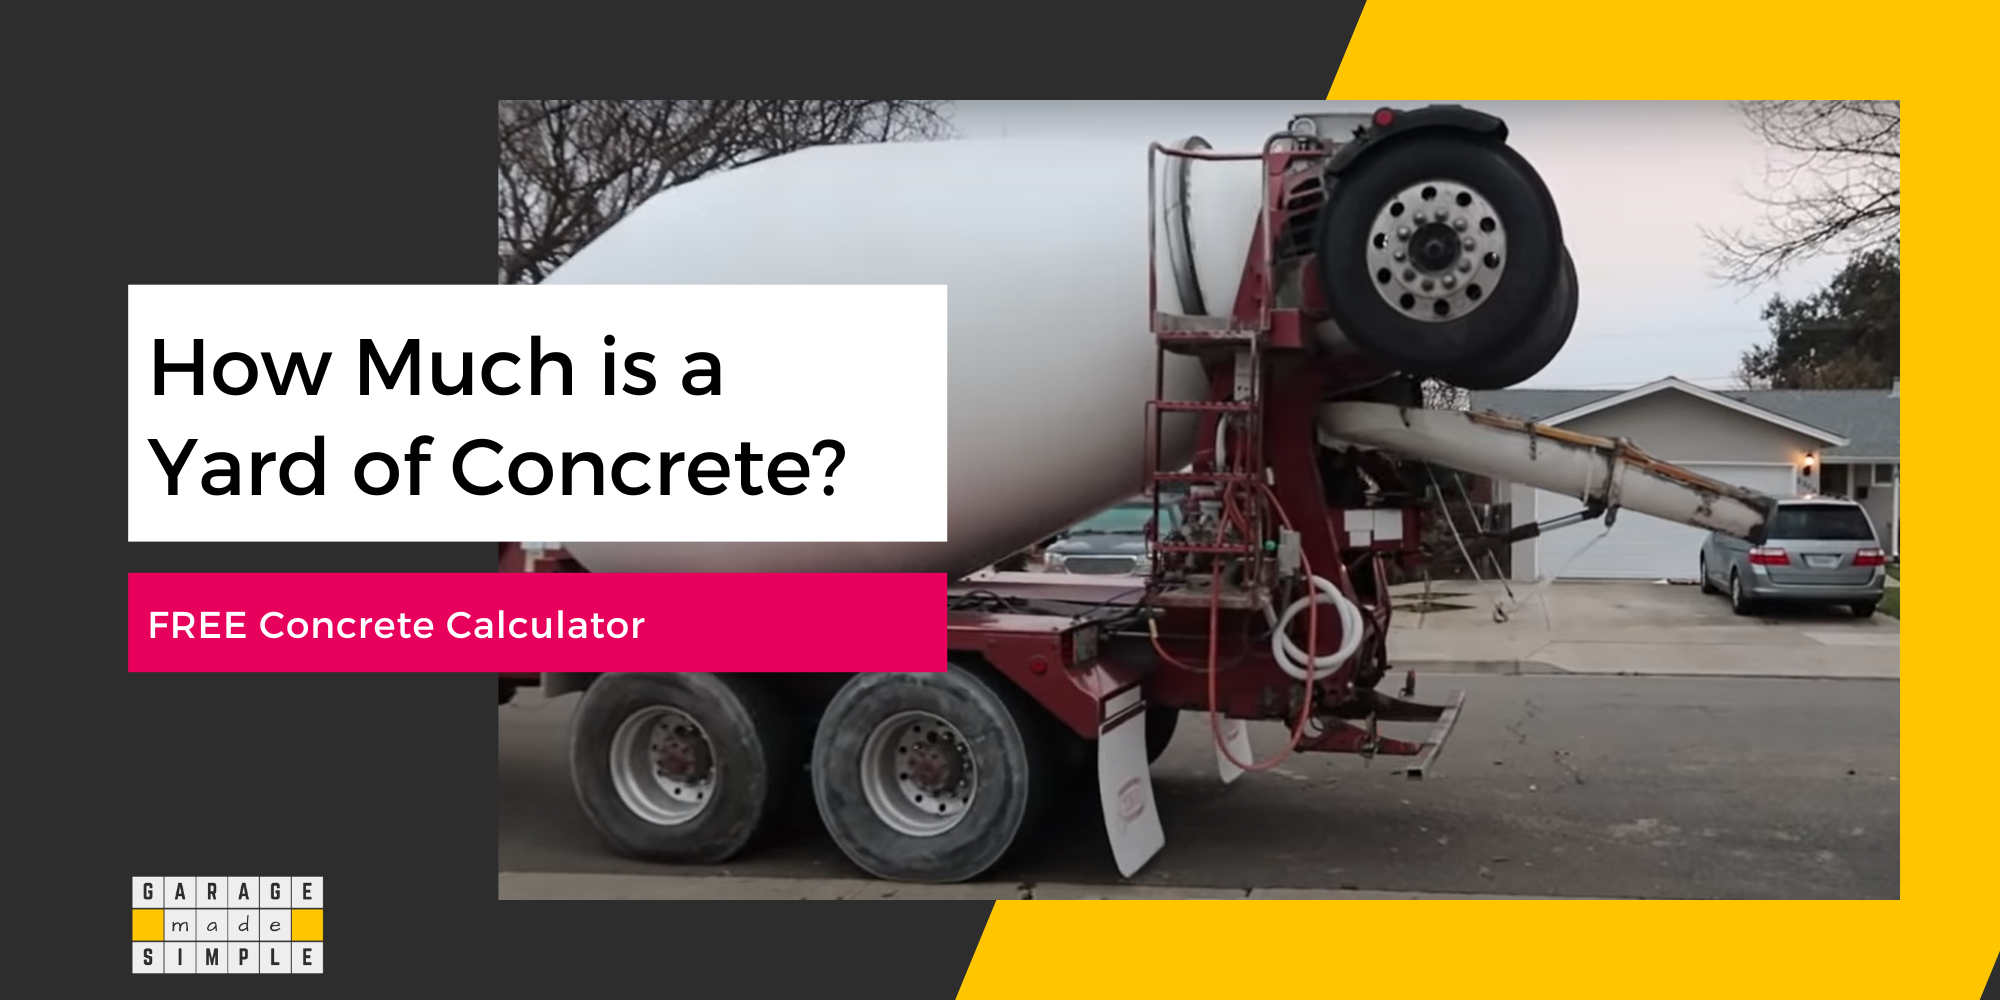
The cost of installing a concrete garage apron varies based on size, labor, and materials. You can expect to spend between $8 to $18 per square foot. (Source: Angi)
Expect to spend $640 to $1440 for a 20’x4′ concrete garage apron. Of this 50% would be material cost. So you could save the other half if you take it up as a DIY project.
Use a concrete garage apron cost calculator to create an accurate budget.
Permits and Building Code Compliance
Check your local building codes to see if you need permits for the project. Many municipalities require that garage aprons follow specific guidelines, especially regarding drainage and moisture management.
Permits ensure your project complies with regulations, avoiding future penalties or structural issues. Check with the local authorities, but expect to pay $50 to $200, depending on your location
Optional Radiant Heating Compatibility
If you live in a cold climate, consider garage apron radiant heating to prevent ice buildup. Radiant heating improves usability during winter, but it adds to the overall project cost and complexity.
Planning ensures your concrete garage apron is durable, functional, and compliant with local codes. Proper slope, budgeting, and permits are essential to prevent costly mistakes down the road.
Tools and Materials You Will Need
Ensure you have all the right tools and materials before you start. Below is a checklist to help you get started.
Tools You’ll Need
- Concrete saw – For cutting back the garage floor and driveway edges.
- Shovels, rakes, and compactors – To dig and prepare the base.
- Trowels and finishing tools – For leveling and smoothing the concrete.
- Rebar tools – To cut, bend, and secure rebar reinforcement.
- Wheelbarrow or cement mixer – For mixing and transporting the concrete.
Materials to Have on Hand
- Best concrete mix for garage apron – Look for a durable, high-strength mix suitable for outdoor use.
- Foam expansion joint strips – These allow for seasonal expansion and prevent cracks.
- Vapor barrier – Essential to protect the slab from concrete moisture problems.
- Gravel or crushed stone – Used to create a solid base for the apron.
- Rebar or mesh reinforcement – Adds structural integrity and prevents cracking over time.
- Sealant – Use to protect the concrete from stains and moisture after curing.
Having the right tools and materials ensures a well-executed concrete garage apron installation.
Invest in high quality materials like rebar, vapor barriers, and the right concrete mix for durability, strength, reduced future maintenance needs.
How to Install a Concrete Garage Apron?
Preparing the grade and pouring concrete for a garage apron is not much different from pouring a “slab on grade”. Of course, there are a few differences.
Below is a detailed guide to help you install your concrete garage apron. Each step covers essential actions, tools, and techniques to ensure a durable, professional result.
Step-by-Step Installation Guide for a Concrete Garage Apron
Step 1: Remove the Old Apron (If Applicable)
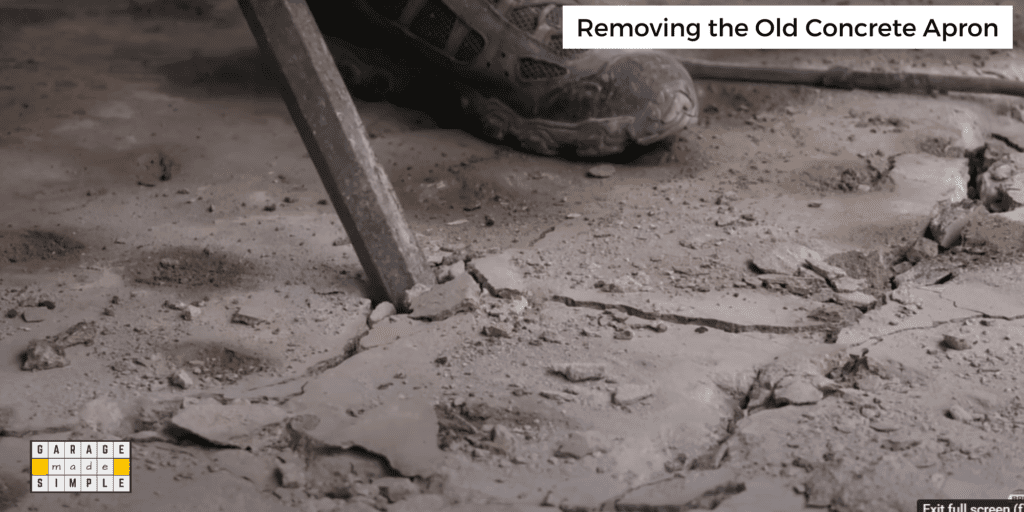
If an old apron or damaged concrete exists, start by carefully removing it. Use a sledgehammer or a demolition saw to break the concrete into manageable pieces.
Once broken, clear all debris to expose the underlying soil or base material. Be cautious while working near the edges of the garage floor and driveway to avoid accidental damage to these surfaces.
If any remnants of the old slab or debris are left behind, they can affect the stability of the new apron, so take the time to ensure a clean working area.
Proper removal also allows for a fresh foundation, ensuring the new apron bonds well and performs as intended.
Pro Tip: Many recycling centers accept broken concrete, which helps reduce landfill waste.
Step 2: Cut Back the Garage Floor for Slope Transition
You must create a smooth slope transition from the garage floor to the driveway. For this, you need to cut back a section to allow the new apron to connect seamlessly.
Measure and mark the cut line about 2–6 inches from the edge, depending on the project’s needs.
Use a concrete saw to make a precise, straight cut along the marked line. Once the excess section is removed, inspect the exposed edge to ensure it’s smooth and ready to bond with the new concrete.
Pro Tip: Always wear safety goggles and a dust mask when using a concrete saw.
Step 3: Dig the Hole for the Apron Base
The strength and durability of your concrete garage apron depends on the quality of its foundation. Start by excavating the area to a depth of 6–8 inches or deeper if the soil conditions require it.
Ensure the excavation extends wide enough to support the apron’s dimensions and maintains a slight slope away from the garage to ensure proper drainage.
After digging, remove any loose soil or debris to avoid weak spots in the base. Compacting the soil at this stage is crucial to prevent future settling, which could lead to cracks in the apron.
If the ground is soft or unstable, add extra gravel or recycled concrete to enhance the base’s stability.
Pro Tip: Use a plate compactor or hand tamper to compact the soil evenly.
Step 4: Finish the Garage Floor Edges
After cutting back the garage floor, smooth the exposed edge to ensure the new apron bonds securely to the existing floor and creates a clean visual separation between the two surfaces.
Use a concrete grinder or a hand chisel to remove any jagged edges or rough spots left behind from the saw cut.
By carefully preparing the edges, you minimize the chance of cracking where the two concrete surfaces meet. This is especially important in areas subject to freeze-thaw cycles, where improper bonding could cause the edges to shift or deteriorate.
Pro Tip: Applying bonding adhesive to the exposed edge before pouring the new apron to improve adhesion and prevent separation over time.
Step 5: Tie the Concrete Apron to the Garage Slab with Rebar
To ensure your apron is stable and resistant to movement, you must reinforce it by tying it to the garage floor slab using rebar.
Drill holes, spaced about 12 to 18 inches apart, into the exposed edge of the garage slab. Insert steel rebar into these holes, ensuring each piece extends into the area where the new concrete will be poured.
Rebar reinforcement is especially important for driveways and aprons that bear heavy loads, such as trucks and SUVs. Without proper reinforcement, the apron could separate from the garage slab.
Pro Tip: Use epoxy adhesive to secure the rebar inside the drilled holes for added strength, especially in colder climates prone to expansion and contraction.
Step 6: Install the Foam Expansion Joint
The joint between the garage floor and the concrete garage apron is an expansion joint. Installing a foam expansion joint is therefore necessary.
Cut the foam expansion strip to the appropriate length and press it firmly into place along the edge of the garage floor before pouring the concrete.
Ensure the strip is flush with the surface to maintain a clean, professional appearance. The foam acts as a flexible seal, absorbing expansion and contractions.
Pro Tip: Use adhesive-backed foam strips for quick installation.
Step 7: Prepare the Base with Gravel and Compaction

A solid base is critical for any slab-on-grade, including a concrete garage apron. Start by laying a 4-6 inch layer of gravel or crushed stone across the excavated area.
The gravel adds stability and promotes proper drainage, preventing water from pooling under the concrete. Spread the gravel evenly and ensure it follows the slope you’ve planned to guide water away from the garage.
Use a plate compactor or hand tamper to compact the base thoroughly. A properly compacted base will give your garage apron the strength to handle heavy loads without shifting.
Pro Tip: Mist the gravel lightly with water before compacting. Damp gravel compacts more effectively and helps create a firmer base.
Step 8: Place the Drain and Insulation (Optional)
If your garage entrance is prone to water issues, this is the time to install drainage solutions.
A trench drain or channel drain at the edge of the apron will divert water away from the garage, preventing moisture buildup. Position the drain along the low point of the slope to maximize efficiency.
In cold climates, consider adding rigid foam insulation beneath the apron. This helps prevent frost from penetrating the concrete, reducing the risk of cracks caused by freeze-thaw cycles.
Insulation is a must, if you plan to install radiant heating beneath the apron.
Pro Tip: If you opt for a drain, wrap it in a fabric filter to prevent dirt and debris from clogging the system.
Step 9: Install the Vapor Barrier and Reinforcement
Install a vapor barrier to protect the apron from moisture coming up from the ground.
Spread the vapor barrier evenly over the compacted gravel base, making sure it extends to the edges. Overlap any seams by at least 6 inches to create a continuous moisture barrier.
Once the vapor barrier is in place, add reinforcement mesh or rebar to strengthen the apron. Rebar is ideal for heavy-traffic areas, while wire mesh works well for lighter loads.
Position the reinforcement a few inches above the vapor barrier, using rebar chairs to keep it elevated in the middle of the slab.
Pro Tip: If using rebar, ensure it overlaps at the joints and is properly tied together with rebar wire.
Step 10: Pour and Finish the Concrete
With the preparation complete, it’s time to pour the concrete for the apron. Use a cement mixer or order a batch of ready-mix concrete to ensure you have enough material.
Concrete mix with a water-to-cement ratio of 0.5 and a strength of 4000 psi is ideal. While it will be harder to work with, it also means that you can get the required slope.
Choose concrete with fiber reinforcement. Fibers not only strengthen the concrete but also prevent it from cracking.
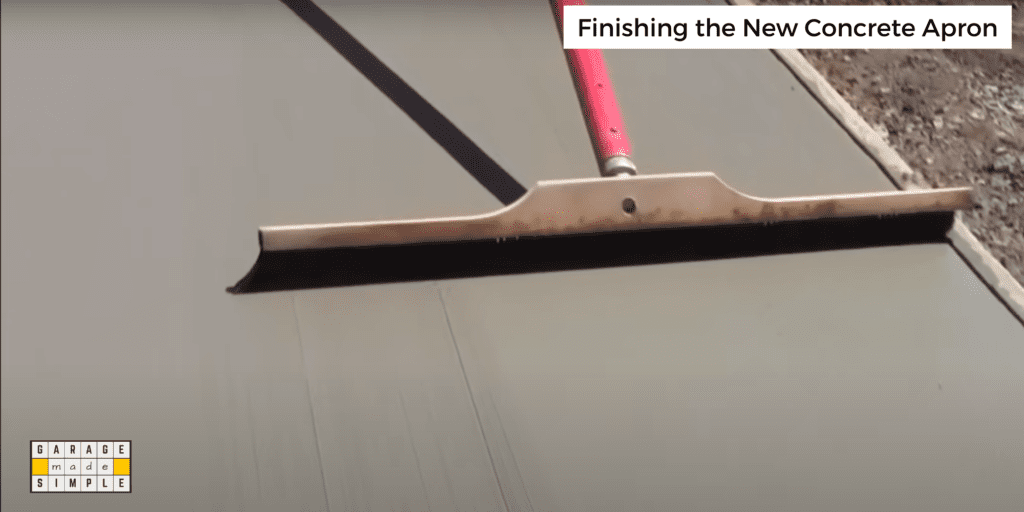
Start at the far edge and work toward the garage, spreading the concrete evenly. Use a rake or concrete screed to level the surface, following the slope you planned for proper drainage.
Once the concrete is leveled, use a bull float to smooth the surface and push down any large aggregate for a clean finish. For edges and corners, apply an edging tool to prevent chipping and create a professional, rounded edge.
Depending on the weather, you may need to re-smooth the surface a few times as the concrete sets.
Pro Tip: Work quickly but carefully—concrete starts to harden within 30-60 minutes, so have your tools and team ready before pouring.
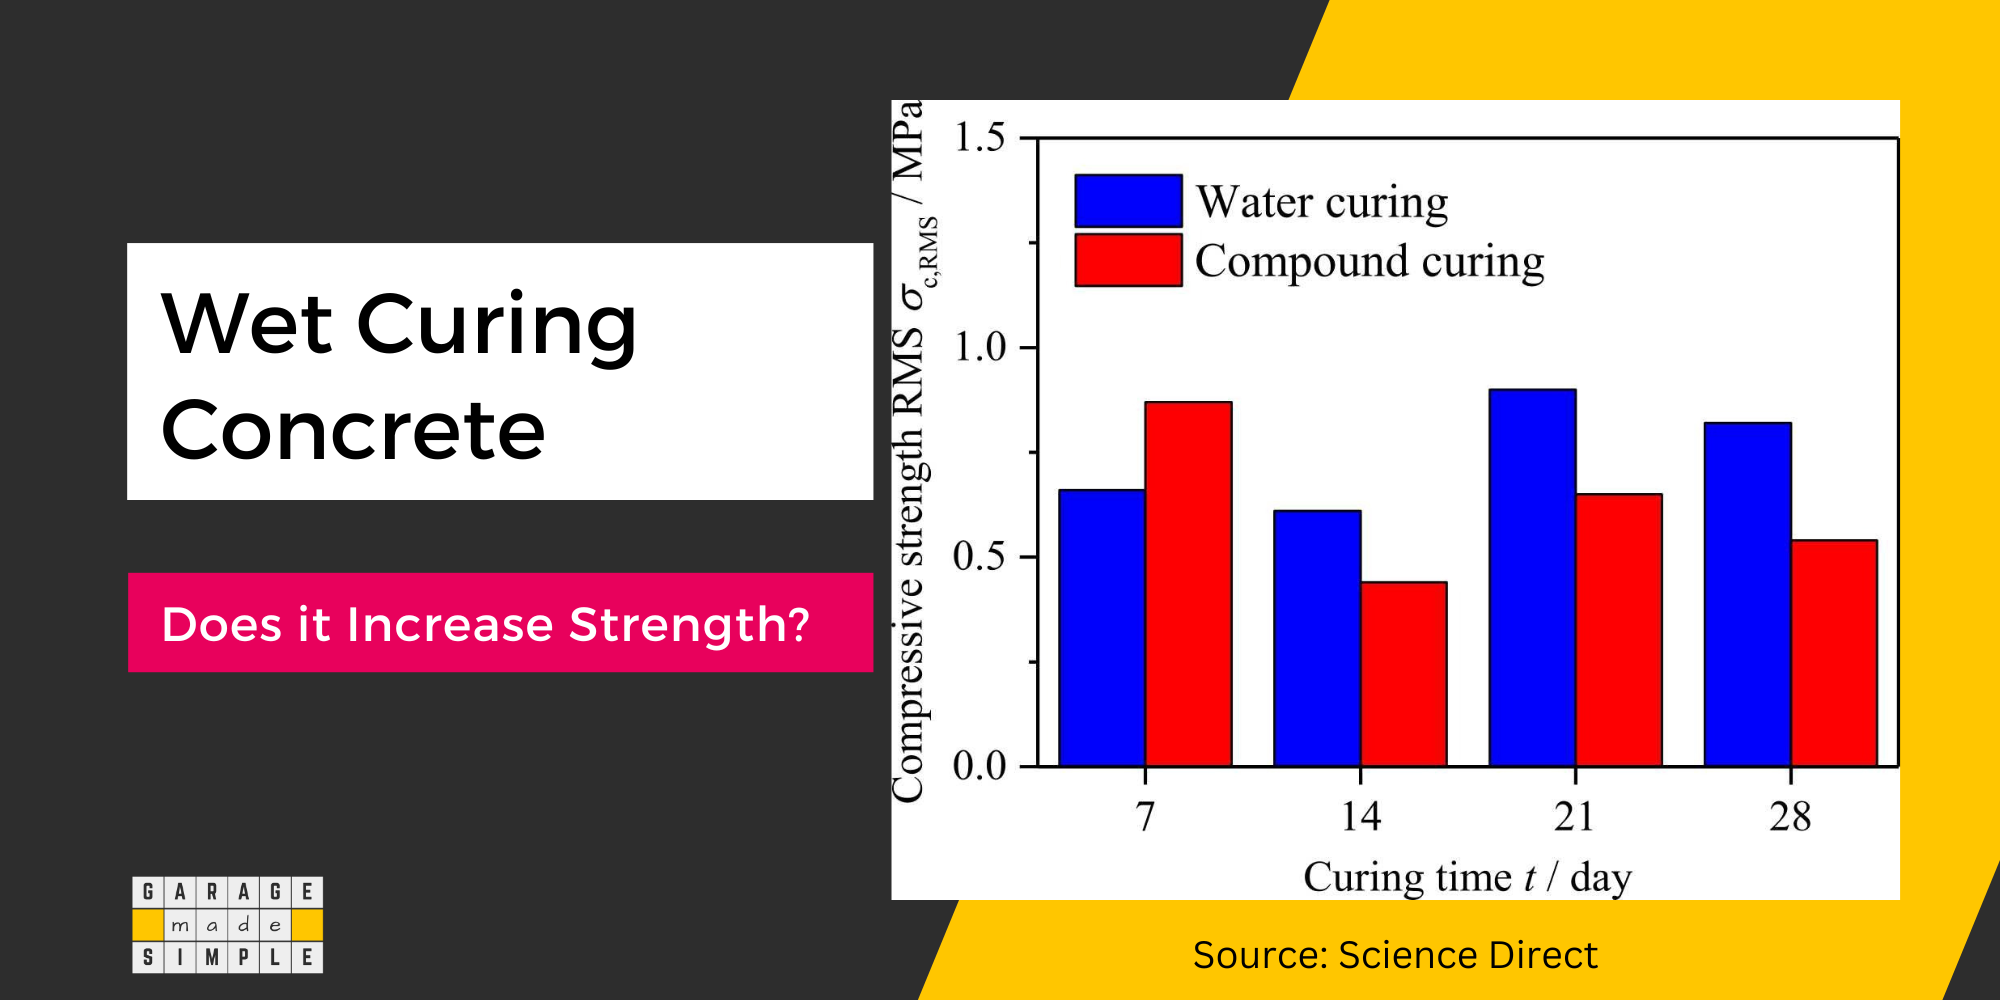
Step 11: Ensure the Concrete Cures Properly
Concrete drying time and curing time are not the same. Your concrete garage apron may be dry enough to permit light traffic in 7-10 days but will need 28 days for full curing. Full curing is essential to give your garage apron the strength it needs.
You always need both contraction and expansion joints in concrete slabs. You already took care of the expansion joint in Step 6.
A 24’ long 2-car garage apron needs 3-4 contraction joints. You can indent it in the finishing stage or cut it with a saw a day later. Contraction joints encourage shrinkage cracks to stay within the joint and not spread randomly.
Once the surface is finished, cover the concrete with plastic sheets or curing blankets to retain moisture. This prevents the concrete from drying too quickly and developing large cracks.
During the first few days, check the moisture levels regularly. If the surface starts to dry out too quickly, lightly mist it with water to slow the process.
Pro Tip: When curing concrete in hot weather, apply a curing compound to prevent water from evaporating too quickly.
Step 12: Seal the Concrete Garage Apron
Once the concrete has fully cured, it’s time to seal the apron to protect it from moisture, stains, and freeze-thaw damage.
Choose a penetrating concrete sealer designed for exterior use. Before applying, ensure the surface is clean and dry to allow the sealer to bond properly. Use a roller or sprayer to apply the sealant evenly across the apron.
Follow it up with a couple of coats of topical concrete sealer. Together they prevent water penetration and protect the concrete apron from oil stains, de-icers, and road salts.
Pro Tip: Apply the sealer in the early morning or late afternoon to avoid direct sunlight, which can cause uneven drying and streaking.
Troubleshooting Common Concrete Apron Issues
Below are some common problems you may encounter with concrete garage aprons and how to address them.
Cracking and Settling
Poor base preparation or improper curing can result in unsightly cracks. Skipping installation of expansion and contraction joints will result in crack development. In colder climates, freeze-thaw cycles accentuate crack propagation.
Small cracks can be repaired using a concrete patching compound, while larger cracks may require resurfacing.
Pro Tip: Minimize cracking by reinforcing the apron with rebar or mesh, ensuring proper curing, and maintaining expansion joints.
Pooling Water or Improper Slope
If water pools between the apron and garage floor or driveway edges, then the slope transition was not set correctly during installation. Pooling water can lead to erosion or moisture seeping into the garage floor and foundation.
To fix this, you may need to install a channel drain, resurface, or grind down high spots to correct the slope. In severe cases, replacing the apron might be necessary.
Pro Tip: Use a laser level during installation to ensure a precise slope for effective water diversion.
Chipping or Edge Damage
Concrete garage aprons can chip along the edges if the apron isn’t finished or sealed properly. Heavy vehicle traffic, snowplows, or salt-based de-icers can also cause surface damage.
Pro Tip: Protect the apron edges by sealing the concrete regularly and using concrete-safe de-icers during winter.
Maintenance and Care Tips
Proper maintenance extends the life of your concrete garage apron and keeps it looking great. Follow these tips to protect your investment.
1. Regular Sealing
Apply a concrete sealer every 1-2 years to prevent water penetration and stains. Sealing protects the apron from moisture, oil spills, and freeze-thaw damage, keeping it durable and low-maintenance.
2. Inspect and Repair Cracks Early
Check the apron regularly for small cracks or chips, especially after winter. Filling small cracks early with a concrete patch prevents them from spreading and avoids costly repairs.
3. Clean the Surface Seasonally
Use a pressure washer or garden hose to clean dirt, debris, and oil stains from the apron. Avoid harsh chemicals that can damage the sealant or concrete surface.
4. Use Concrete-Safe De-Icers
During winter, avoid salt-based de-icers, which degrade the concrete. Opt for concrete-friendly products such as calcium magnesium acetate to prevent damage.
5. Prevent Heavy Loads Near the Edges
The apron edges are more prone to chipping and wear. If possible, avoid parking heavy vehicles or equipment directly on the edge to reduce the risk of cracking or damage.
Pro Tip: Schedule routine inspections at the start of each season.
Bottom Line
The bottom line is that the concrete garage apron is an important link between your garage and your driveway. Specifically it
- Acts as a visual demarcation
- Provides the required slope between two levels
- Separates the two as they experience different freeze-thaw cycles
- Can incorporate the drain to divert rainwater & snowmelt
- Can have radiant heating to melt snow easily
Thank you very much for reading the post. I do hope you found it informative and useful.