How to Fill Garage Concrete Slab Joints? Comprehensive Guide
As an Amazon Associate, I earn from qualifying purchases.
What are Concrete Slab Joints?
Concrete slab joints are essential elements in concrete construction, designed to control cracking and ensure the structural integrity of the slab. The two that are really important are:
- Expansion Joints (aka Isolation Joints): Allow for the expansion and contraction of the concrete due to temperature changes, commonly used in large commercial projects.
- Control Joints (aka Contraction Joints): Planned cracks that allow for movements caused by temperature changes and drying shrinkage, controlling where the concrete will crack.
What is a Concrete Slab Expansion Joint?
A Concrete Slab Expansion Joint is a gap placed between concrete slabs to allow for expansion and contraction due to temperature changes.
Concrete Slab Expansion joints prevent cracks by absorbing the stress caused by the slab’s movement. Typically filled with a flexible material like rubber or foam, they ensure the structural integrity and longevity of the concrete surface.
What is a Concrete Slab Control Joint?
A Concrete Slab Control Joint is a groove cut into the slab to control where cracks will occur due to shrinkage during curing.
Concrete Slab Control joints are typically spaced at regular intervals and are not filled with any material. Control joints create a weakened plane to ensure that any cracking happens along these predetermined lines, maintaining the slab’s overall appearance and structural integrity.
What Is the Difference Between Expansion Joints and Control Joints?
Expansion Joints and Control Joints serve different purposes in concrete slabs:
Expansion Joints:
Expansion Joints (aka Isolation Joints) are gaps filled with flexible material, allowing the slab to expand and contract with temperature changes. They prevent cracks by absorbing stress from the slab’s movement.
Control Joints:
Control Joints (aka Contraction Joints) are grooves cut into the slab to control where cracks occur due to shrinkage during curing. They create a weakened plane, ensuring cracks happen along predetermined lines.
According to EMSEAL (a Sika Company):
In building materials, a control joint is used to control cracking while an expansion joint is designed to handle structural movement.
EMSEAL a SIKA Company
Both are important for maintaining the slab’s structural integrity and appearance.
Comparison of Concrete Slab Expansion Joints vs. Control Joints
| Aspect | Concrete Slab Expansion Joints | Concrete Slab Control Joints |
|---|---|---|
| Purpose | Allow for expansion and contraction due to temperature changes | Control where cracks occur due to shrinkage during curing |
| Structure | Gaps filled with flexible materials like rubber or foam | Grooves cut into the slab, not filled with any material |
| Function | Absorb stress from the slab’s movement, preventing cracks | Create a weakened plane, ensuring cracks happen along predetermined lines |
| Placement | Typically placed at regular intervals, especially in large slabs or where slabs meet other structures | Spaced at regular intervals, often determined by the slab’s dimensions and design |
| Material | Flexible fillers that can compress and expand | No filler; the groove itself serves the purpose |
| Importance | Necessary for maintaining structural integrity and preventing damage due to thermal expansion | Required for maintaining the slab’s appearance and structural integrity by directing cracks to specific locations |
Key Differences
- Functionality: Expansion joints handle thermal movement, while control joints manage shrinkage cracks.
- Structure: Expansion joints are gaps with flexible fillers; control joints are grooves without fillers.
- Placement: Expansion joints are used where slabs meet other structures or in large areas; control joints are spaced based on slab dimensions.
Both types of joints are vital for the longevity and performance of concrete slabs, ensuring they remain crack-free and structurally sound. Proper planning and installation of these joints are essential for any concrete project.
Why Fill Concrete Slab Joints?
Fill the garage slab expansion joints, with a flexible sealer, to get a seamless floor that is easy to clean & maintain. Filling gaps prevents moisture & water from seeping into the concrete floor and weakening it.
It is important & necessary to understand the role of control & expansion joints in a garage concrete slab floor, and the difference between the two.
Garage Slab Expansion Joints
Garage Slab Expansion Joints separate (isolate) two concrete slabs or structures. Expansion joints are created before the concrete is poured. Moreover, expansion joints are typically at least ½” wide.
Some locations that require expansion joints are:
- Where the horizontal floor slab meets a vertical column or wall
- Where two different horizontal slabs (such as garage floor & driveway) meet
Garage Slab Control Joints
Garage Slab Control Joints are made into the concrete slab shortly after the slab has been poured. As part of the curing process, water evaporates from the concrete causing it to shrink.
Control joints are created to accommodate that shrinkage. Without the control joints, concrete will shrink and crack randomly. With control joints, we can induce the cracks to take place within the space of the control joint.
Control joints can be made by:
- Saw Cutting
- Grooving Tool
- Inserting a Plastic Strip
Control joints are always made after pouring the concrete but before it has fully cured and set. Control joints should be no farther apart than 2 – 3 times (in feet) to the concrete slab thickness (in inches).
| Minimum Slab Thickness for Garage (in inches) | Recommended Gap between Control Joints (in feet) |
| 4” | 8’ – 12’ |
| 6” | 12’ – 18’ |
| 8” | 16’ – 24’ |
Should You Fill Control & Expansion Joints Before Epoxy?
Irrespective of whether your garage has been built on a T-shaped wall foundation or a slab-on-grade foundation, the garage floor will certainly have control & expansion joints.
The question that may be bothering you is what do you do with these joints? Should you fill the garage slab control & expansion joints before or after the epoxy application? Or should you not fill them at all?
Filling up the control & expansion joints before an epoxy application will result in a seamless, visually appealing, and easy-to-maintain epoxy garage floor.
The most critical decision at this stage is the material that you will use to fill the joints. The use of a non-flexible joint filler defeats the very purpose of the control & expansion joints.
If you were to use a non-flexible filler in a control joint, the garage floor epoxy coating would look seamless. To begin with!
However, sooner rather than later the cracks in the concrete will telegraph themselves into the epoxy coating. The epoxy coating will certainly crack, as it is rigid.
You don’t want that to happen to your garage floor epoxy coating. Experienced contractors will warn you about this possibility in advance and will not guarantee the work.
The best fillers for control & expansion concrete garage floor joints are either a 100% solids, epoxy filler, or an elastomeric polyurea filler. They will cure to a hard finish but will have the flexibility to move along with the concrete.
This will prevent the epoxy topcoat from cracking.
Recommended Product:
ElastiPoxy Concrete Joint & Crack Filler Kit
- Flexible Repair To Allow For The Natural Movement Of Concrete And Joints.
- Adhesion To Damp Surfaces, Making It Ideal For Basements, Slab On Grade, And Driveways.
- Permanently Fills And Repairs Leaking Contraction Joints, Floor To Wall Joints, Expansion Joints, And More.
- High-Quality, 100%-Solid, 2-Component Epoxy.
- Just Add Sand To Increase Workability And Use As A Super Strong Mortar Alternative
ElastiPoxy Joint & Crack Filler Kit is a commercial-grade, self-leveling, 100% solids, hybrid, two-component flexible epoxy. Used for a strong and long-lasting repair of control joints, saw cuts, defects, mortar joints, and large stress cracks in poured concrete, concrete blocks, and masonry surfaces.
ElastiPoxy is widely used in the building industry, but easy enough for DIY homeowners to use around the home.
ElastiPoxy is impact-resistant and bonds tenaciously with concrete. Virtually indestructible under high water pressure and heavy vehicular, machinery, and foot traffic.
It is chemically resistant to perform under the harshest of conditions. Alternatively, when mixed with construction sand, ElastiPoxy provides a strong, rigid repair for filling large cracks, mortar, and surface defects in poured concrete walls, floors, and concrete blocks
Use a foam backer rod or silica sand to reduce the filler quantity needed for saw-cut control joints. Silica sand is a better choice, in the case of V-shaped control joints.
Recommended Product:
Should You Fill Control & Expansion Joints After Epoxy?
Have you chosen to epoxy your garage floor without filling in the control & expansion joints? If so you may be facing a situation where dirt & debris collect in those joints and are difficult to clean. But can you fill garage slab control & expansion joints after epoxy coatings or sealers?
Yes, you can fill the garage slab control & expansion joints even after sealer or epoxy application. You have to use the right product and application method, such that the joints blend into the coating, both visually and physically.
The most suitable product for filling the control & expansion joints, after the epoxy application, is 100% solids, polyurethane (PU) joint sealers/fillers. They are usually gray and can be applied with a caulking gun.
100% solids, PU fillers are flexible, moisture-proof, and quite inexpensive. Once the filler has dried, it feels like synthetic rubber but is strong enough for foot & vehicle traffic.
Recommended Product:
- Premium quality sealant, concrete self-leveling caulk. No tooling is required, levels itself. It is Water immersible & waterproof after cure
- PERFORMANCE: Self-leveling, pourable with permanently elastic, and can be painted with water-based, oil-based, or rubber-based paints. Able to bridge gaps up to 1.5 in. wide
- SUPPORTS: Excellent adhesion on concrete and cementitious slabs.
- DURABILITY: High durability and resistance to aging and weathering.
- USES: Can be used on driveways, garages, sidewalks, balconies, pavements, terraces, warehouses, factories, civil structures, and plazas.
How To Fill Garage Slab Expansion Joints?
To fill the garage slab expansion joints you need to
- Use a broom to clean out the joints. Make sure that all dirt, grit, pebbles, and other debris are removed. Use a shop-vac to get the last bits out.
- Use a stiff brush dipped in a concrete cleaner to degrease the joints.
- Wash away the cleaner with a garden hose and wait for the joint to completely dry.
- Press a backer rod along the length of the joint. Use the correct size. The top of the backer rod should be at least ⅛” and not more than ½” below the floor surface.
- Cut the tip of the sealant tube such that the diameter of the cut nozzle matches the width of the joint.
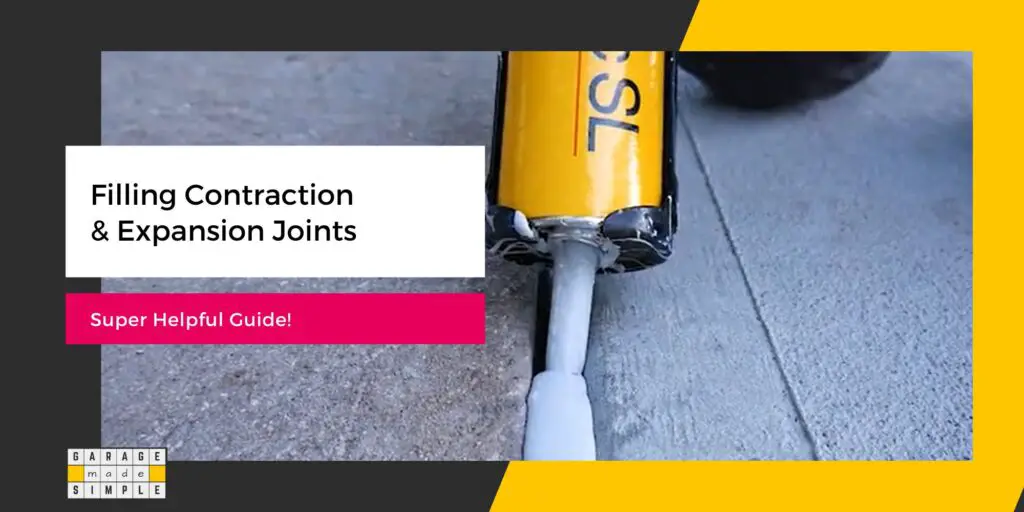
- Insert the tube into a caulking gun and gently press to fill the joint as you move the gun along it.
- Clean up any excess immediately with a putty knife to get a smooth level finish.
NOTE: Always wear safety eyeglasses & waterproof gloves when working with PU sealants.
How To Fill & Seal the Gap Between Garage Floor & Driveway?
Filling & sealing the gap between the garage floor & the driveway is possibly even more important than filling & sealing control and expansion joints within the garage.
Rainwater and snow melt, almost always, will fill this gap and then permeate down into the concrete. Water is concrete’s worst enemy. Water seepage destroys concrete from within.
The only way to protect the concrete garage slab and the concrete driveway is to fill & seal the gap!
You can do this in three simple steps:
Prep the gap by cleaning it thoroughly and removing all dirt & debris
Due to the exposure to the elements the gap between the garage and driveway is usually full of dust, mud, dried leaves, dead insects, etc. Take a screwdriver and dig deep into the gap, pulling out everything that you can.
Next, use a wire brush to remove any remaining debris. You can also use a pressure washer to clean out the gap. Of course, then you need to let it completely dry out.
Fill the gap with fine sand, followed by backer rod
The gap between the garage floor and the driveway is wide and deep. Without filler, you will spend just too much on the sealant. And the result will not even be good!
Start by using fine sand. Sand will go into the cracks and crevices (something a backer rod can not do). This will prevent the sealant from dripping through the cracks and getting wasted.
Next insert the right-sized backer rod, pushing it to the bottom of the joint. However, the top of the backer rod should remain reasonably below the garage slab and driveway.
This is where the sealant will go
Seal the joint
Finally use a self-leveling, flexible sealant to fill the gap. The sealant will quickly sink into the deep spots and level out. Try not to overfill the joint. Wipe out any overfill with a putty knife.
Recommended Product:
Thank you very much for reading the post. I do hope you found it informative and useful.
FAQ
Can You Fill Expansion Joints with Epoxy?
You can fill expansion joints with epoxy provided it is 100% solid and flexible. Do not use standard epoxy coatings as epoxy is not flexible.
A 100% solids, epoxy is self-leveling. As such it flows into the expansion joints, every nook & corner, and fills it up completely.
The key word here is “flexible”. Anything used to fill an expansion joint that is not flexible defeats the very purpose of an expansion joint.
A nonflexible filling will simply crack when the expansion joint expands or contracts with temperature changes.
Elastomeric polyurea is also a good choice for filling expansion joints in a garage floor.
Can You Fill Control Joints with Sand?
Control joints are typically 3/16” wide and 1” deep. A 2-car garage will have 2 of them running in a + shape, right across the floor.
That is a lot of volume to fill up with flexible sealant. Flexible sealants do not come cheap!
To reduce the cost you can insert flexible backer rods or silica sand before applying the flexible sealant.
Silica sand works better in V-shaped joints as the fine particles reach deeper. Sand will also prevent sealant from going through the cracks at the bottom of the control joints.
Sand is both waterproof and weatherproof. So that helps too!
Can You Use Polymeric Sand in Concrete Expansion Joints?
Polymeric sand is an upgraded version of sand. Fine sand is mixed with additives & polymers that harden and lock the sand together when water is added. Polymeric sand allows joints to expand and contract with temperature variations.
Using polymeric sand as a filler, especially for large outdoor concrete slabs such as driveways & patios is that the filling is more durable and unlikely to be washed away by rain.
Polymeric sand is also an insect and weed deterrent. On the flip side, polymeric sand is expensive and must be applied quickly & carefully. A mistake and you will have hardened gritty concrete surfaces around the joint!
What Do Backer Rods Do?
Backer rods are made of flexible foam and are available in many lengths & diameters. They can be inserted in garage slab control & expansion joints or concrete cracks to reduce the consumption of the sealant, which is expensive.
Backer rods also have the following other benefits:
* Reducing the effective joint depth & sealant thickness
* Increasing sealant elasticity
* Increasing contact area between sealant & joint by creating an hour-glass shape
* Making it easier to clean out the joint later, if required
