How to Paint Over Epoxy Floors?: Comprehensive Guide
As an Amazon Associate, I earn from qualifying purchases.
Epoxy floor coatings are renowned for their durability, sleek appearance, and ability to withstand heavy wear—no wonder they are popular for garage floors, basements, and workshops.
However, even the toughest epoxy surfaces can look worn over time or no longer match your new decor color and style.
No worries. You can paint over epoxy floors to refresh their appearance and cover up minor imperfections.
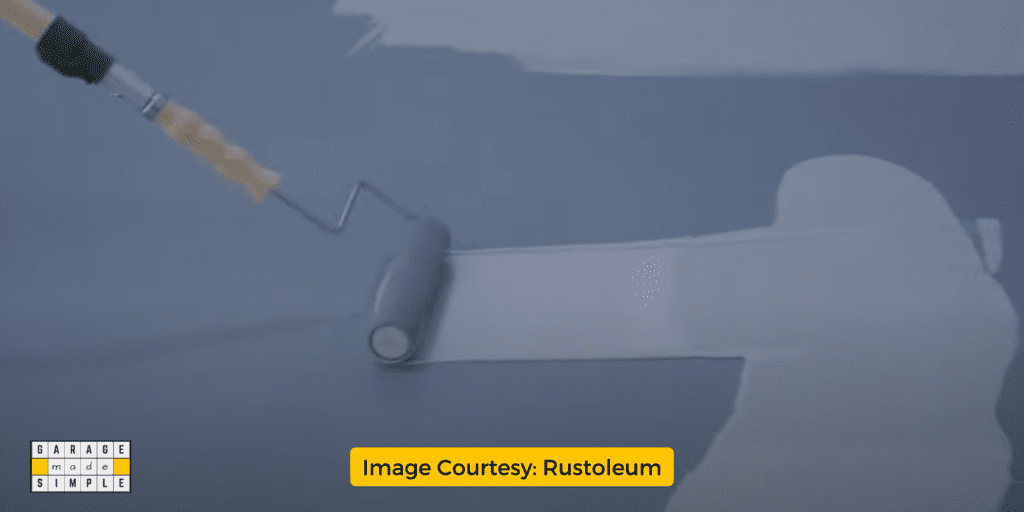
But success hinges on doing it right. From selecting the right epoxy floor paint or coating to properly preparing the surface, specific steps must be followed to ensure a lasting and attractive finish.
In this guide, I explain everything you need to know about recoating epoxy floors, including the compatible and best paints to use, how to prepare your floor, and common pitfalls to avoid.
Whether, you’re tackling a garage, patio, or basement, this article will help you achieve professional results.
Understanding Epoxy Floor Coatings
When applied to concrete floors, epoxy floor coatings form a hard, durable surface. This coating is known for its excellent resistance to wear, chemicals, and stains, making it a favorite for garages, workshops, and other high-traffic areas.
What Makes Epoxy Floors Special?
The main ingredient of these coatings is the epoxy resin. The resin chemically bonds with a hardener to create a seamless floor coating on the concrete or other surfaces.
Epoxy coating, with the right, surface preparation, has an excellent adhesion to the substrate.
The coating itself is hard, glossy, and easy to clean and maintain. Epoxy floor coating is the perfect choice if you want chemical-resistant floors.
Beyond the Garage: Other Use-cases of Epoxy Floors
While garages are the most common use-case for epoxy flooring, these coatings can also be found in:
- Basements: Protects against moisture and adds a polished look.
- Workshops: Withstands heavy tools and equipment.
- Patios: Durable and resistant to outdoor elements (though UV resistance is poor).
- Commercial Showrooms: Provides a glossy, professional finish.
Irrespective of the location, you can usually paint over epoxy floors to rejuvenate their looks and rectify the wear & tear they may have undergone.
1. Basements
Basements are an excellent candidate for epoxy floor coatings. Painting over an existing epoxy layer can add warmth, match your interior style, or improve light reflection in dimly lit spaces.
2. Patios
For outdoor areas like patios, UV-resistant topcoats such as PU coatings can enhance the durability of the existing epoxy and prevent it from yellowing or degrading.
3. Workshops
Heavy traffic, vibrations, and impacts can result in workshop epoxy floors getting chipped or developing cracks. Applying a fresh coat or two of epoxy can return them to their original looks and performance characteristics.
You can also make the epoxy floor slip-resistant by incorporating an anti-skid additive in the topmost layer.
4. Commercial Spaces
Immaculate looks are critical in showrooms, retail floors, or other professional environments. Frequent recoating of an existing epoxy floor is essential for easy cleaning and keeping customers happy.
Can You Paint Over Epoxy Floors?
The short answer is yes, you can paint over epoxy floors.
However, there are a few factors that, if not addressed correctly, can result in subpar results.
Not all surface conditions are ideal for recoating, so it’s important to evaluate your floor’s condition and determine if painting is the right solution.
When Is It a Good Idea to Paint Over Epoxy Floors?
Repainting an epoxy floor is a smart option if:
- You want a fresh look: Over time, colors can fade, or you might want a new color to match your decor objective.
- The surface has minor damage: Small scratches or blemishes can be covered with a new coat of paint.
- You need improved functionality: Adding a slip-resistant texture or UV protection can make the floor safer and more durable.
When Should You Not Painting Over Epoxy Floors?
Sometimes, repainting isn’t the best option:
- Structural damage: If the existing epoxy has deep pitting, bubbling, or cracks, the floor must be stripped and repaired before any new coating is applied.
- Delaminated epoxy: Peeling or delaminated epoxy indicates underlying issues; applying new epoxy will worsen the problem.
- The epoxy floor has a concrete sealer: Epoxy topcoat does not adhere to most sealers, so they must be removed first.
- Contaminated surfaces: Epoxy floors that may have been exposed to heavy oil, grease, or chemical spills may prevent proper adhesion.
- No time for surface preparation: Painting over epoxy floors without the proper surface prep, is setting yourself up for failure, right from the start.
Paint Compatibility with Epoxy Floors
Not all paints will adhere properly to an epoxy floor. Choosing the right type of paint is critical for achieving a durable and long-lasting finish.
Here are the most common options:
Types of Paints Compatible with Epoxy Floors
- Latex/Acrylic Paints:
- Easy to apply and clean up.
- Best for light-traffic areas.
- Limited durability compared to other options.
- Alkyd Enamels:
- Moderate durability.
- Affordable and widely available.
- Use a primer for best results.
- 1-Part Epoxy Paints:
- Pre-mixed and simple to use.
- Higher durability than latex or alkyd paints.
- Suitable for medium-traffic areas.
- 2-Part Epoxy Paints:
- The most durable option for high-traffic or industrial use.
- Requires mixing before application.
- Resistant to chemicals, stains, and heavy wear.
- Polyurethane Coatings:
- Best for outdoor areas requiring UV resistance.
- Flexible and resistant to cracking.
- A clear topcoat over epoxy floors improves gloss and toughness.
Table of Comparison
| Paint Type | Durability | Ease of Use | Ideal For | Cost |
| Latex/Acrylic | Low | High | Light traffic areas | Low |
| Alkyd Enamel | Moderate | Moderate | Moderate traffic areas | Low–Moderate |
| 1-Part Epoxy | High | High | Medium traffic areas | Moderate |
| 2-Part Epoxy | Very High | Low | High traffic areas | High |
| Polyurethane | Very High | Moderate | Outdoor areas | High |
Rust-Oleum RockSolid Garage Floor Coating Kit
Rust-Oleum Rocksolid Garage Floor Coating
Rust-Oleum RockSolid Garage Floor Coating Kit is made from a unique polycuramine formula that provides a tough, ultra-hard coating on properly prepared interior concrete floors including garages.
Selecting the Ideal Paint for Your Epoxy Floor Project
Choosing the right paint for your epoxy floor recoating project depends on the desired finish, expected performance, and budget.
Here are the key factors to consider:

Desired Finish
- Glossy Finish: Popular for showrooms or garages with a polished, high-end appearance.
- Matte or Satin Finish: This is best suited for basements as it reduces glare and provides a more subdued look.
- Textured or Anti-Slip: Essential for areas prone to spills or moisture, like patios, decks, and workshops.
Traffic Levels and Durability
- Light Traffic Areas: Latex or alkyd paints can suffice.
- Medium to Heavy Traffic: Opt for 1-part or 2-part epoxy paints, which are more robust.
- Industrial or Commercial Spaces: Consider 2-part epoxy or polyurethane coatings for maximum resilience.
Performance Needs
- Chemical Resistance: This is necessary for garages and workshops to withstand oil and chemicals.
- Slip Resistance: Safety requirement in areas that are expected to be wet such as pool decks. Ramps should also have slip-resistant coatings.
- UV Resistance: This is important for patios or other outdoor areas to prevent fading.
Recommended Paint Options
- Basements: 1-part epoxy, acrylic, or low-sheen alkyd enamel.
- Patios & Decks: Polyurethane coatings with UV protection. Incorporate an anti-skid additive in the topmost layer.
- Garages & Workshops: 2-part epoxy coatings. Incorporate an anti-skid additive in the topmost layer in walkways and ramps.
- Commercial Spaces: Polycuramine, Polyaspartic, or Polyurethane coatings. Though UV resistance is not a requirement, these coatings have excellent scratch resistance due to their flexibility.
How to Paint Over Epoxy Floors
Follow a step-by-step process to paint over epoxy floors and get the desired results. Each step requires attention to detail for lasting results.
Proper preparation ensures the new paint adheres well, while careful application techniques help you achieve a smooth and durable finish.
This guide walks you through every step.
Step 1: Inspect and Assess the Floor
Before starting, inspect the floor to determine its condition:
- Look for Surface Damage: Identify cracks, chips, or peeling epoxy. Painting over damaged areas without repair can result in an uneven finish.
- Check for Stains or Contaminants: Grease, oil, or other residues will interfere with adhesion. Even thorough cleaning may not be effective as the stains may have penetrated deep.
- Evaluate Adhesion of Existing Coating: If the epoxy is flaking or bubbling, it must be removed or repaired before recoating.
👉 Pro Tip: Perform a water drop test by sprinkling water on the floor. If the water beads, the surface is too smooth and will require additional cleaning and sanding.
Step 2: Repair Cracks, Chips, and Imperfections
Surface imperfections need to be repaired to create a smooth base:
- Small Cracks and Chips: Fill these with an epoxy-based filler or patching compound.
- Use a putty knife to apply the filler evenly.
- Allow the material to cure fully according to the product instructions.
- Large or Deep Cracks: These require a more robust approach, such as using a self-leveling epoxy compound.
- Apply the compound to the damaged area and smooth it out.
- Sand down the repaired sections after they harden to level them with the surrounding surface.
👉 Pro Tip: Don’t skip sanding repaired areas. Uneven patches can create weak spots for the new paint.
Step 3: Thoroughly Clean the Surface
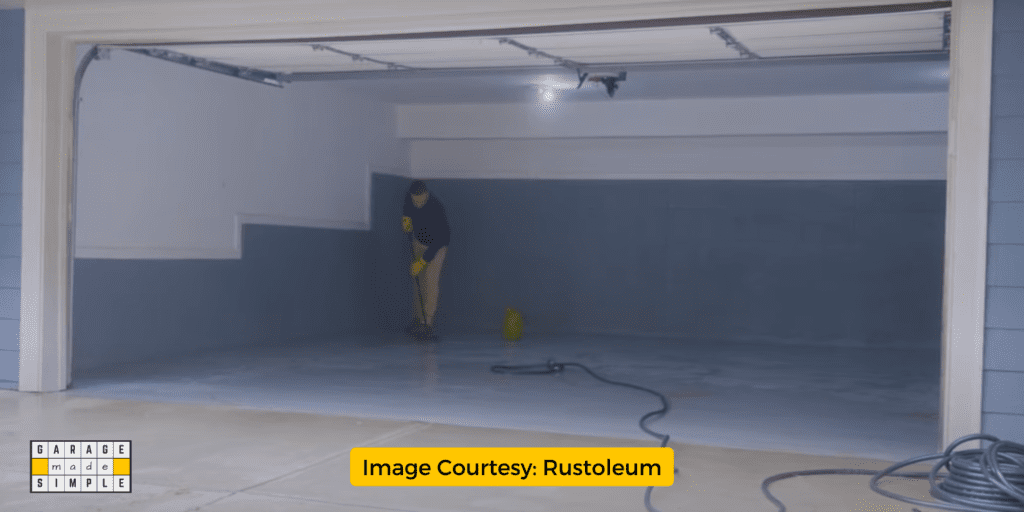
A clean surface is critical to ensuring proper paint adhesion:
- Sweep and Vacuum: Remove all dirt, dust, and debris. Pay special attention to corners and edges where dust often collects.
- Degrease the Floor:
- Use a degreaser or a solution of trisodium phosphate (TSP) mixed with water.
- Apply with a mop or sponge, focusing on areas with visible stains or oil marks.
- Rinse the Floor: Thoroughly rinse off cleaning agents to prevent residue, which can interfere with adhesion.
- Dry Completely:
- Let the surface air dry or use fans to accelerate drying.
- Avoid starting the next step until the floor is 100% dry.
👉 Pro Tip: Use a blacklight to spot hard-to-see grease or oil stains that may remain after cleaning.
Step 4: Roughen the Existing Epoxy Surface
Epoxy floors are designed to resist wear, so you’ll need to create texture for the new paint to adhere.
- Sand the Floor:
- Use 120–150 grit sandpaper or a mechanical floor sander for large areas.
- Focus on creating a uniformly scuffed surface; you’re not removing the existing epoxy but roughening it.
- Edges and Corners: Use hand sanders or sanding blocks to reach tight spaces that machines can’t access.
- Vacuum Dust: Thoroughly vacuum the area to remove all dust particles. Wipe the surface with a damp microfiber cloth to capture any remaining residue.
👉 Pro Tip: Wear a dust mask during sanding to avoid inhaling fine particles.
Step 5: Prime the Surface (Optional but Recommended)
A coat of primer may seem unnecessary. However, applying a coat of primer is helpful in two respects.
- The primer helps color transition, especially when applying light-colored paint on a darker epoxy floor as you will use less paint.
- The primer functions as a tie coat between the existing epoxy and the new paint film increasing adhesion between the two coats.
Here is the process
- Select the Right Primer: Use a primer designed for concrete or epoxy surfaces.
- Some primers are tinted, which can enhance the final color.
- Application:
- Apply the primer in thin, even coats using a roller.
- Use a brush for edges and corners.
- Drying Time: Allow the primer to cure fully before painting. Check the product data sheet for how long it should take to dry.
👉 Pro Tip: Primer is especially helpful if transitioning between different types of coatings, such as latex over epoxy.
Step 6: Choose the Right Paint and Tools
Selecting the correct epoxy floor paint and tools is crucial:
- Tools:
- Rollers for large areas.
- Paintbrushes for edges.
- Consider a sprayer for ultra-smooth finishes.
- Paint Type:
- Use 2-part epoxy paint for durability.
- Polyurethane coatings are excellent for outdoor and UV-exposed areas.
👉 Pro Tip: If you’re using 2-part epoxy paint, mix only the amount you can apply within its pot life to avoid wastage.
Step 7: Apply the Paint Coat
Now it’s time to paint. Work methodically for the best results:
- Stir Thoroughly: Mix the paint according to the manufacturer’s instructions. For 2-part epoxy, combine the resin and hardener in the correct ratio.
- Apply Thin, Even Coats:
- Use a roller to apply the paint in thin layers.
- Avoid overloading the roller to prevent drips and uneven finishes.
- Work in sections, maintaining a “wet edge” to prevent visible lines where sections overlap.
- Let It Dry: Allow the first coat to dry completely (usually 12–24 hours) before applying the next layer.
- Apply a Second Coat: For better coverage and durability, apply a second coat following the same process.
👉 Pro Tip: Keep the room ventilated while painting to help the paint cure evenly and reduce odors.
Step 8: Apply a Clear Topcoat (Optional but Recommended)
The application of a clear topcoat enhances durability and provides extra protection:
- Choose the Right Topcoat: Use polyurethane or a clear epoxy topcoat for added UV and chemical resistance.
- Application:
- Apply in a thin, even layer using the same tools as the paint coat.
- Allow the topcoat to cure fully before exposing the floor to foot or vehicle traffic.
👉 Pro Tip: A topcoat can provide a specific finish, such as gloss or matte. You can also incorporate anti-skid additive in it.
Step 9: Allow the Floor to Cure
Patience is key to a durable finish:
- Drying vs. Curing: While the paint may feel dry to the touch after 24 hours, full curing can take 7–10 days.
- Avoid Heavy Use: Refrain from moving furniture, driving vehicles, or heavy foot traffic until the curing process is complete.
Avoiding Common Mistakes When Painting Over Epoxy Floors
Even small missteps can lead to peeling paint, poor adhesion, or an uneven finish when repainting an epoxy floor.

Here are the most common mistakes to avoid and how to prevent them:
1. Skipping Surface Preparation
- Why It’s a Problem: A smooth or dirty surface prevents proper paint adhesion, leading to peeling and bubbling.
- How to Avoid It: Always sand the floor to roughen the surface, clean thoroughly, and let it dry completely before painting.
2. Using Incompatible Paint
- Why It’s a Problem: Not all paints adhere well to epoxy coatings. An incompatible recoat material can result in poor adhesion and a patchy finish.
- How to Avoid It: Choose paints specifically designed for epoxy floor recoating.
3. Applying Paint Too Thickly
- Why It’s a Problem: Thick coats can take longer to dry, trap air bubbles, and cause uneven surfaces.
- How to Avoid It: Apply thin, even layers and let each coat dry fully before applying the next.
4. Ignoring Environmental Factors
- Why It’s a Problem: High humidity, extreme temperatures, or poor ventilation can affect paint curing, leading to peeling or uneven drying.
- How to Avoid It: Follow the manufacturer’s temperature and humidity recommendations. In case of high humidity levels, use fans or dehumidifiers.
5. Rushing the Curing Process
- Why It’s a Problem: Premature use of the floor, before the paint fully cures can lead to scuff marks and uneven surfaces.
- How to Avoid It: Wait 7–10 days for the floor to cure completely before heavy use.
Troubleshooting Common Epoxy Floor Painting Issues
Challenges can arise during or after the painting process despite proper surface preparation.
Here’s how to tackle common problems:
1. Peeling Paint
- Cause: Poor surface preparation or using incompatible paint.
- Solution: Sand down the affected area, clean thoroughly, and repaint using a primer and appropriate paint.
2. Bubbling or Blistering
- Cause: Trapped air or moisture under the paint, often due to applying too thick a coat or painting on a damp surface.
- Solution: Sand down the bubbles, ensure the surface is dry, and apply thin coats of paint.
3. Uneven Finish
- Cause: Inconsistent application or using the wrong tools.
- Solution: Sand the uneven areas lightly and apply another thin coat of paint. Use high-quality rollers or a sprayer for an even film.
4. Poor Adhesion
- Cause: Glossy or unprepared epoxy surfaces.
- Solution: Sand the surface thoroughly to create texture and apply a primer for epoxy coatings before recoating.
5. Streaks or Visible Lines
- Cause: Allowing the edges of paint sections to dry before blending them.
- Solution: Work quickly, maintaining a “wet edge” to avoid overlap marks.
Frequently Asked Questions (FAQs)
1. Can you paint over epoxy floors without sanding?
No, sanding is essential to roughen the surface and allow the new paint to bond properly. Skipping this step can lead to peeling or poor adhesion.
2. How long does painted epoxy flooring last?
The lifespan depends on the type of paint and the level of traffic. High-quality 2-part epoxy paint can last 5–10 years in high-traffic areas, while latex or acrylic may need touch-ups sooner.
3. Can you use regular wall paint on an epoxy floor?
No, wall paint is not designed for floors and won’t adhere well to epoxy. It also lacks the durability required to withstand traffic and wear. Always use epoxy floor paint or a compatible coating.
4. How much does it cost to repaint an epoxy floor?
Costs vary depending on the size of the area and the type of paint used. On average:
Latex Paint: $0.50–$1 per square foot.
1-Part Epoxy Paint: $1–$2 per square foot.
2-Part Epoxy Paint or Polyurethane Coating: $2–$4 per square foot.
Bottom Line
Painting over an epoxy floor is a fantastic way to refresh its appearance, repair minor imperfections, or enhance its functionality. Success comes down to preparation: cleaning, sanding, and choosing the right paint and primer.
Thank you very much for reading the post. I do hope you found it informative and useful.


