How To Fix Gap Between Driveway And Garage In 5 Easy Steps!
As an Amazon Associate, I earn from qualifying purchases.
Why is There a Gap Between the Driveway and the Garage Floor?
The gap between the driveway and the garage floor is an expansion joint.
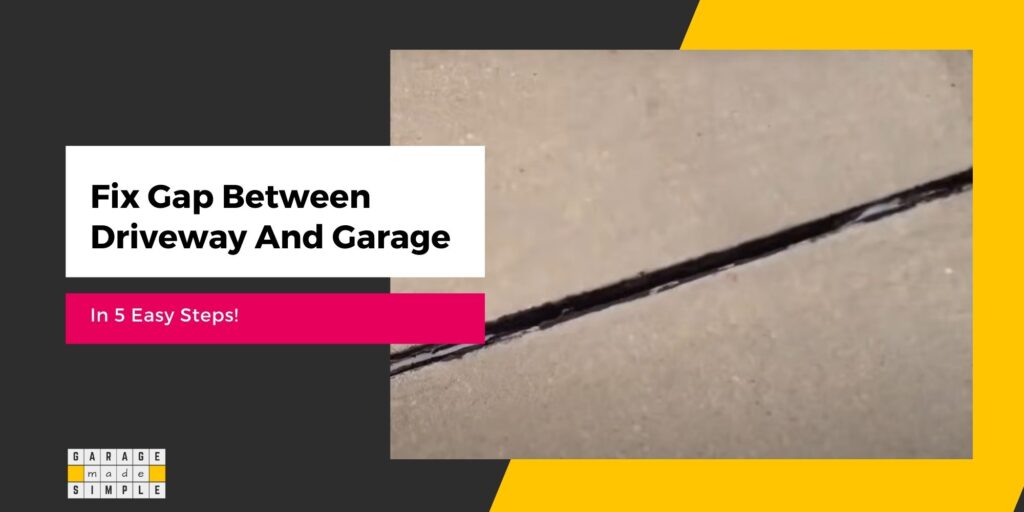
The joint is placed to allow space for the concrete garage slab and the driveway concrete slab to expand and contract with temperature changes, without pushing each other.
The expansion joint prevents cracks and damage to both the garage floor and the driveway. Without this gap, the stress from expansion and contraction could cause significant cracking in both the driveway and the garage floor.
Why Do I Need to Fix Gap Between Driveway and Garage Floor?
You need to fix and seal the gap between your driveway and garage floor to:
- Prevent Water Infiltration: Water can seep through the gap and undermine the base material supporting the slabs. This can lead to erosion and weakening of the foundation. Water can freeze and expand, (freeze-thaw cycle), causing cracks and further damage. This is quite common in extremely cold climates.
- Avoid Insect Infestation: Gaps can become a haven for insects like ants, which can create nests and become a nuisance in your garage.
- Prevent Weed Growth: Weeds can grow in the gap, causing pressure damage to both the driveway and the garage floor.
- Maintain Structural Integrity: The gap allows for the expansion and contraction of the concrete slabs due to temperature changes. Without it, the slabs could crack and deteriorate.
- Aesthetic Appeal: Sealing the gap improves the overall appearance of your driveway and garage, giving it a well-maintained look.
“concrete does indeed expand when it gets hot or when the moisture content changes”
Concrete Construction
Entry of water is particularly detrimental to the durability of the concrete. There are 3 ways water hurts concrete:
1. Chemical Reaction:
Cement is alkaline and the coarse aggregates (sand & gravel) have silica. Alkali reacts with active silica to form a gel. This gel can then absorb water, swell, apply pressure, and cause concrete to crumble.
2. Freeze-Thaw Cycle:
In regions where temperatures drop below the freezing point, water in the gap goes through a freeze-thaw cycle. The freeze-thaw cycle causes stress in the concrete and makes cracks grow.
3. Rebar Corrosion:
Water in the gap can seep into the concrete pores and corrode the rebars or wire mesh. Corrosion is more severe if the water has salt (in coastal regions or use of salt-based deicing chemicals).
However, the flexible filler and sealant deteriorate with time, UV radiation & chemical degradation. This is why, every once in a while, you need to fix the gap between the driveway and garage.
Key Takeaways: How to Fix Gap Between Driveway and Garage
- Fill expansion joint between driveway and garage to prevent water, debris, and insects from entering.
- Use polymeric sand to fill cavities and voids.
- Insert backer rod into gap to reduce sealant quantity and provide a good fit.
- Seal gap with a flexible sealant, such as Sikaflex Self Leveling Sealant.
- Clean gap thoroughly and remove loose debris before filling and sealing.
To fix the gap between the driveway and garage, the gap is filled up with a flexible material, which permits expansion & contraction but stops water, debris, and insects from entering the gap.
You can fix the gap between the driveway and the garage in 5 easy steps. It is a simple DIY project that takes just a few hours.
So here are the 5 easy steps you need to take to fix the gap between the driveway & garage:
STEP 1: Assemble Equipment, Tools & Supplies
Assemble all the equipment, tools, and supplies you will need for the project as per the list below:
Equipment & Tools You Will Need
- Shop Vac or a Pressure Washer
- Screwdrivers, Putty Knives, Trowel, Metal Brushes
- Caulk Gun
Supplies You Will Need
- Polymeric Sand
- Closed-cell Foam Backer Rod
- Polyurethane Self-leveling Sealant
What Is the Best Sealant for Expansion Joints?
Sikaflex polyurethane joint sealants are the best sealants for expansion joints because they offer many advantages, including:
- Superior adhesion: Sikaflex polyurethane sealants will bond to more surfaces, particularly porous substrates such as concrete and masonry, without the use of a primer.
- Minimal substrate staining: Sikaflex polyurethane sealants possess an extremely stable consistency and will not stain or discolor virtually any common substrate.
- Water resistance: Many Sikaflex polyurethane sealants can be placed in totally immersed environments without being affected by the action of the water.
- Dirt resistance: Because of their exclusive chemical design, Sikaflex polyurethane sealants exhibit far less dust and dirt pick-up during cure and over the lifetime of the building.
- Paintability: Sikaflex polyurethane sealants can be treated with most coatings and paints without the risk of delamination.
In addition to these advantages, Sikaflex polyurethane joint sealants are also very durable and flexible, making them ideal for sealing expansion joints that must withstand movement and exposure to the elements.
Sikaflex Self-Leveling Sealant
- Premium quality sealant, concrete self-leveling caulk. No tooling is required, levels itself. It is Water immersible & waterproof after cure
- PERFORMANCE: Self-leveling, pourable with permanently elastic, and can be painted with water-based, oil-based, or rubber-based paints. Able to bridge gaps up to 1.5 in. wide
- SUPPORTS: Excellent adhesion on concrete and cementitious slabs.
- DURABILITY: High durability and resistance to aging and weathering.
- USES: Can be used on driveways, garages, sidewalks, balconies, pavements, terraces, warehouses, factories, civil structures, and plazas.
STEP 2: Prepare The Gap
The gap between the driveway and the garage will be full of dirt, dry leaves, rotting twigs, and dead roaches to name a few. And then of course there will be the remains of previous filler material.
You start by getting the gap as clean as a whistle!
The easy option is to use a pressure washer. However, I do not recommend it as it is not thorough. The manual way is to clean the gap using sharp objects such as a screwdriver, putty knife, wire brush, etc. Whatever you have on hand & whatever works for the situation.
Use the shop vac to suck out the loose debris as you claw it free.
Try not to leave anything behind, including any small pieces of concrete that may have broken or flaked off. Break off loose pieces with a chisel, if required.
STEP 3: Fill in the Cavities
It is quite likely that you will discover cavities and voids that you had not bargained for. It is not unusual for the base sand to settle and subside as water drips through the gap. These voids should not be ignored.
You could fill the cavities, deep within the gap, by pouring regular sand in the gap. The sand will find its way into the cavities. However, I recommend using “Polymeric Sand” rather than regular sand.
Polymeric Sand consists of fine sand mixed with silica additives. The additive gets activated when water is sprayed on the polymeric sand. It forms a hard, gel-like compound and creates a permanent bond between the sand particles.
Though more expensive than regular sand, it lasts for over 10 years as compared to 2 years for regular sand.
STEP 4: Insert the Backer Rod
The Backer rod is a flexible rope that compresses to fill the gap. It gives the sealant something to cling onto. It also helps reduce the quantity of sealant that you will need to fill the gap. The backer rod is a lot cheaper than the sealant for the same volume of the gap.
Buy backer rods that are somewhat thicker than the gap width. This way you can push the backer rod into the gap with your fingers or a putty knife and get a nice, snug fit.
1” Closed Cell Backer Rod should be a good fit for your project.
Press it in so that it is ¼” – ½” below the concrete surface. This is what the sealant will fill up.
STEP 5: Seal the Gap
You must seal the gap with a sealant that is flexible. Do not use any sealant or caulk. Flexibility is the key to ensuring the stress created in the concrete due to thermal fluctuations is not translated to crack expansion & propagation.
Sikaflex Self-Leveling Sealant is the most suited for fixing the gap between the driveway and garage. It is a single-component, self-leveling, premium-grade polyurethane sealant with an accelerated curing capacity. It can bridge gaps up to 1 ½”.
Place the tube inside a caulk gun and start the sealing from one end. Dispense the sealant into the gap, completely covering the backer rod and bridging the gap from edge to edge. The sealant has good flow properties and gets into every nook & cranny.
Remove any excess sealant that may be above the level of the driveway or garage floor using a trowel or putty knife. Allow the sealant to dry thoroughly.
Top Tips & Tricks to Properly Seal Expansion Joints
Here are some tips & tricks to help you fix the gap between the driveway and the garage like a pro!
- Clean the joint out thoroughly before applying the sealant.
- Use a backer rod or sand to backfill the joint, leaving a half-inch gap at the top.
- Cut the tip of the sealant tube to match the size of the joint.
- Apply the sealant starting at the bottom of the joint and working your way up.
- Keep the tip of the sealant tube inside the joint to avoid trapping air bubbles or overflowing.
- When coming to the end of a run, stop releasing pressure on the back of the tube before lifting it.
- Use duct tape as a painter’s tape to prevent making a mess.
- Be patient and let the sealant cure for the recommended amount of time before using the area.
That’s all there is to it!
Thank you very much for reading the post. I do hope you found it informative and useful.


