Can You Grow Basil in a Garage? (A Quick Helpful Guide!)
As an Amazon Associate, I earn from qualifying purchases.
Can You Grow Basil in a Garage?
Basil is essential to Italian cuisine. Basil adds flavor and aroma to a host of dishes ranging from salads, pizzas, pastas, etc. The key ingredient of pesto sauce is basil. Nothing like some fresh basil to bring your cooking to life! But can you grow basil indoors, in your garage?
You can grow basil in your garage, in planters or pots. It does require some work in the initial stages. Providing 6 hours of sunlight each day can be a challenge in a garage, but basil will grow equally well under Fluorescent or LED grow lights. Fresh basil leaves, whenever you want, is well worth the effort.
In addition to being aromatic and flavorful, basil also comes with several health benefits. Basil is packed with antioxidant and anti-bacterial properties. Incorporating fresh basil in your food will boost digestion, improve skin health and help detoxify your body.
Basil is an easy herb to grow in a garage. Basil seeds germinate in 7 to 10 days and the leaves are ready for picking in just 3 to 4 weeks.
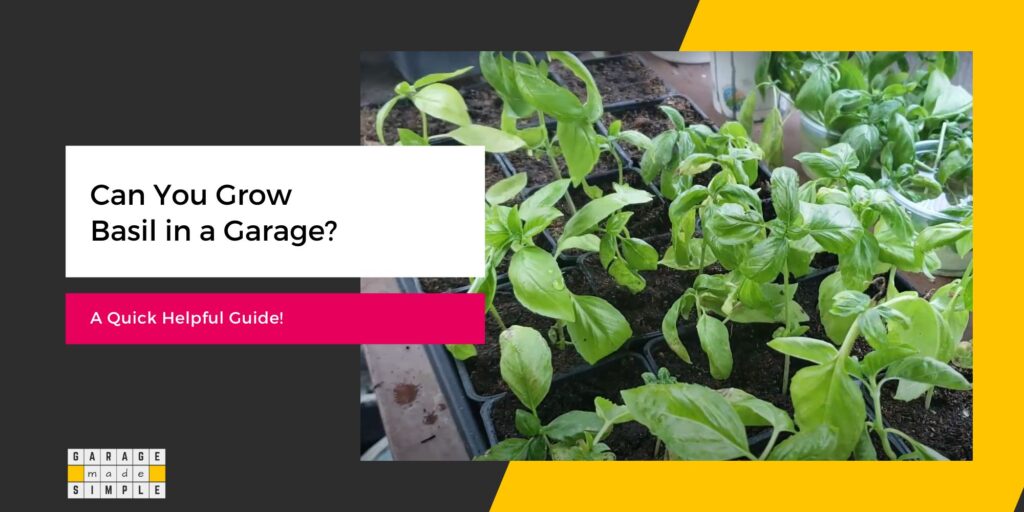
Indoors a basil plant will live for 6 months. You can, and must, pick the basil leaves regularly. This will keep the plant healthy as new leaves continue to grow.
Besides extensive use in Italian cuisine, basil is also a staple in several Thai, Indonesian and Vietnamese curries.
How to Grow Basil from Seeds in a Garage?
Use a Shallow Tray to Start Off
Use a shallow plastic tray for planting the basil seeds. You could reuse a food or salad container. A 6” – 12” container with a depth of 3” – 4” and a lid will do just fine. Punch holes at the bottom for drainage.
Buy Seed Starting Potting Mix
Buy a good quality seed starting mix such as Miracle-Gro Seed Starting Potting Mix. Open the pouch and pour the mix in a large plastic tub or bucket. Add water and knead with your hands or mix with a trowel.
Keep adding water and kneading (troweling) till all the water is completely absorbed. Make sure that the seed starting potting mix is moist but not wet or soggy. Fill up the plastic tray with the moist potting mix to a depth of around 2”.
Sow the Basil Seeds
Sprinkle the basil seed on the potting mix. Make sure that the seeds have enough gap between each other. This will give them room to grow. It will also be easier to pry the seedlings out when it is time to repot.
Sprinkle a fine layer of potting mix over the seeds so that they are lightly covered. Press down the potting mix and sprinkle water over it. The potting mix should be wet but not soggy.
Seed Germination Process
Cover the tray with its lid or plastic film to keep the moisture in. Place the tray on a shelf in an area of the garage which is warm.
At this stage the seeds do not need light. They just need moist warmth to germinate. Make sure to mist the potting mix in the tray every day to ensure it is always moist.
Basil seeds usually germinate in 7 – 10 days. In 3 – 4 weeks after sowing the basil plant will be ready for its first repotting.
First Repotting
Individual basil seedlings need to be repotted in 2″ plugs so that they have more space to grow. You can use plastic seedling trays with holes at the bottom or use an organic biodegradable plug tray, which will come in handy for the second repotting.
Fill up the plugs with potting mix and poke a small hole in the center with your finger. Pry out the individual basil seedlings using a knife or a fork and place it in the hole you made in the filled up plug. Each seedling now gets its own plug to grow in.
Place the plug tray(s) in a 1″ deep plastic tray, without any holes at the bottom. This will keep the potting mix in the plug tray moist. Sprinkle water when the tray begins to dry up.
Second Repotting
After 3 weeks in the plug tray (6 weeks from sowing of seeds) the basil plants should be ready for a second repotting. Now they need larger planters or a 1 gallon container for each plant. You can buy the planters or pots on Amazon using the link below:
Fill up the planter or the individual pot with potting mix. Add some fertilizer or compost to the potting mix for healthier plant growth.
Pry out the basil plants from the plug using a knife. The plant along with the roots and soil must be planted in the new containers. Plant them individually in pots or spaced out by 6″ – 10″, if in a large planter. Cover with some fresh potting mix and water.
Basil Needs Light to Grow
Basil needs a minimum of six hours of direct sunlight each day. This may not be possible in a garage.
The alternative is to arrange to grow them under T5 Fluorescent grow lights such as HYDRO PLANET T5 Grow Lights. Choose the size that works for your set up.
Use a mix of cool white and warm white fluorescent tubes to mimic natural sunlight. Keep the lights at least 4” – 6” above the basil and turn them on for 8 – 10 hours a day.
Basil grows equally well under LED Grow Lights. You could use Monios-L T8 LED Grow Lights.
Providing Sufficient Nutrition
In addition to light and water the basil plant needs sufficient nutrition in the form of correctly formulated fertilizer. A balanced all purpose fertilizer works fine for basil plants. Apply the fertilizer every 7 days.
I recommend using an all purpose nutrient such as Miracle-Gro Performance Organics All Purpose Plant Nutrition.
Managing Growth & Harvesting
As the plant begins to grow (7 – 8 weeks from sowing), pinch the top and discard. This will encourage the plant to mature and stop it from seeding.
By week 9 or week 10 the basil plant is ready to be harvested. Do this by using a pair of garden scissors and snipping off the top 8 – 10 leaves from the main stem. Harvest regularly. Not only will you get the basil you need the basil plant will actually grow bushier and healthier.
Bottom Line
The bottom line is that adding basil to your list of vegetables and herbs to grow in the garage is an excellent idea. It does require some effort in the initial stages but the work put in, is well rewarded. You will always have an adequate supply of fresh basil for the picking.
Thank you very much for reading the post. I do hope you found it informative and useful.


